# Getting started
Once you have created your account, you can start using the TAWNY platform.
# 1. Login
You can login to the platform via https://platform.tawny.ai/login (opens new window) with the same credentials you used in the registration form.
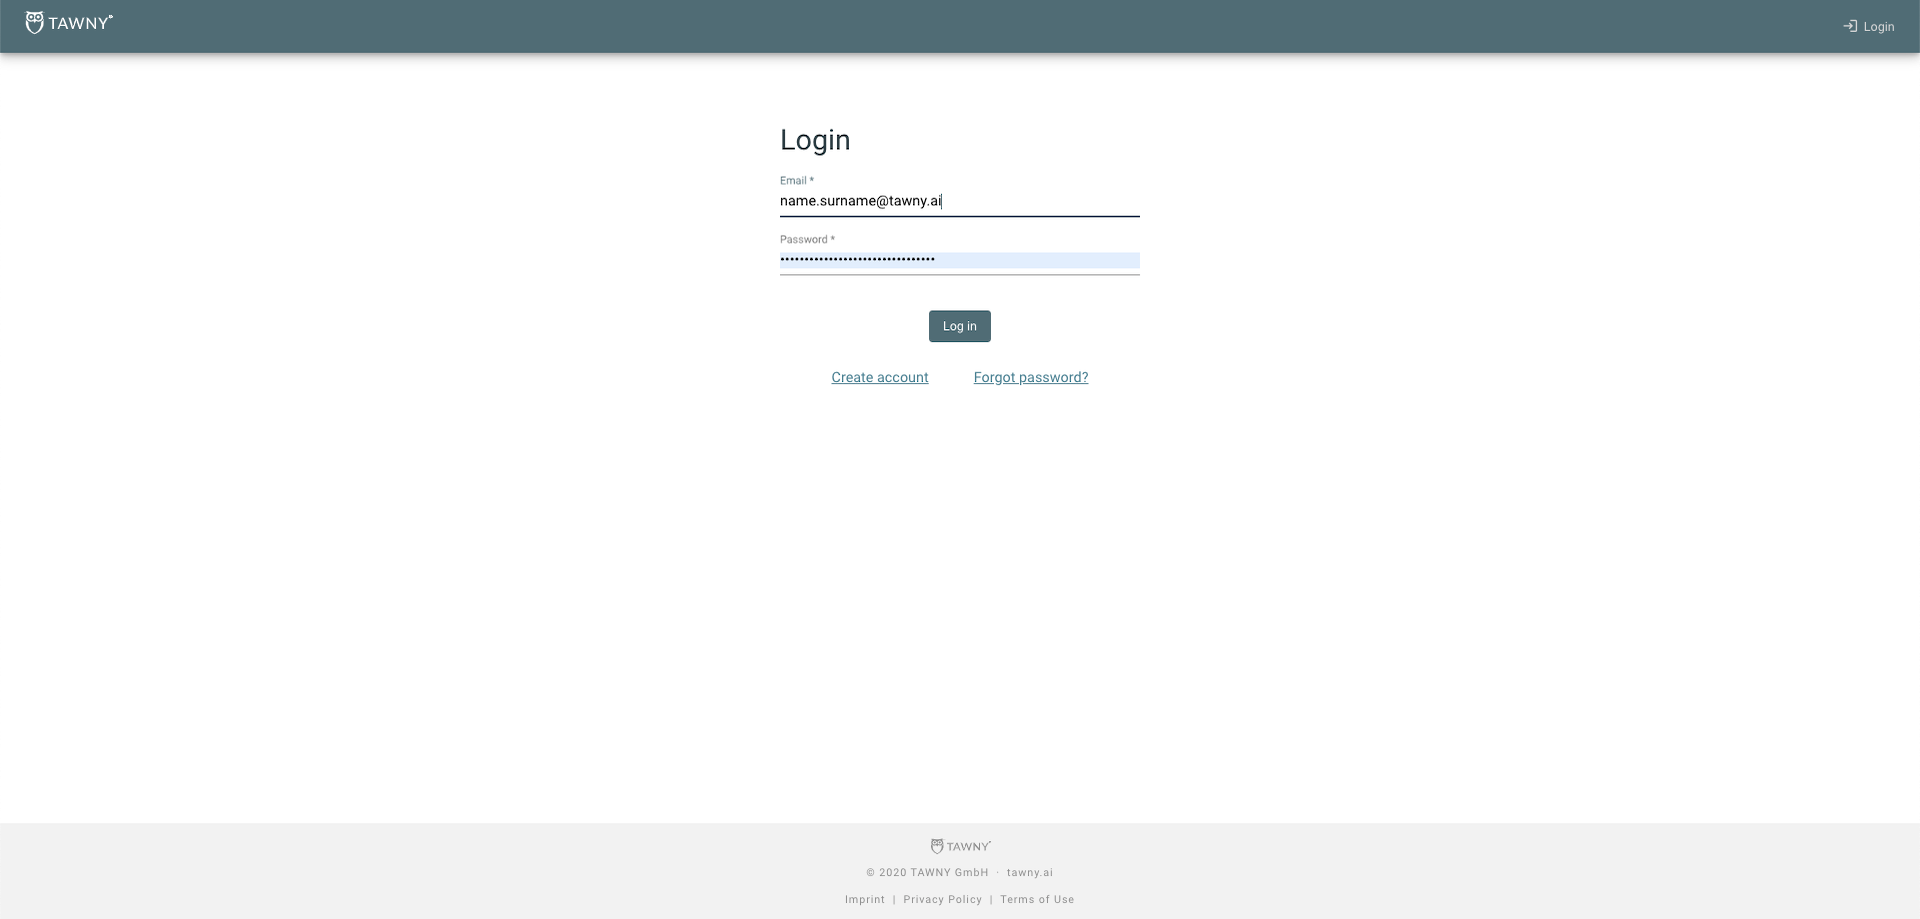
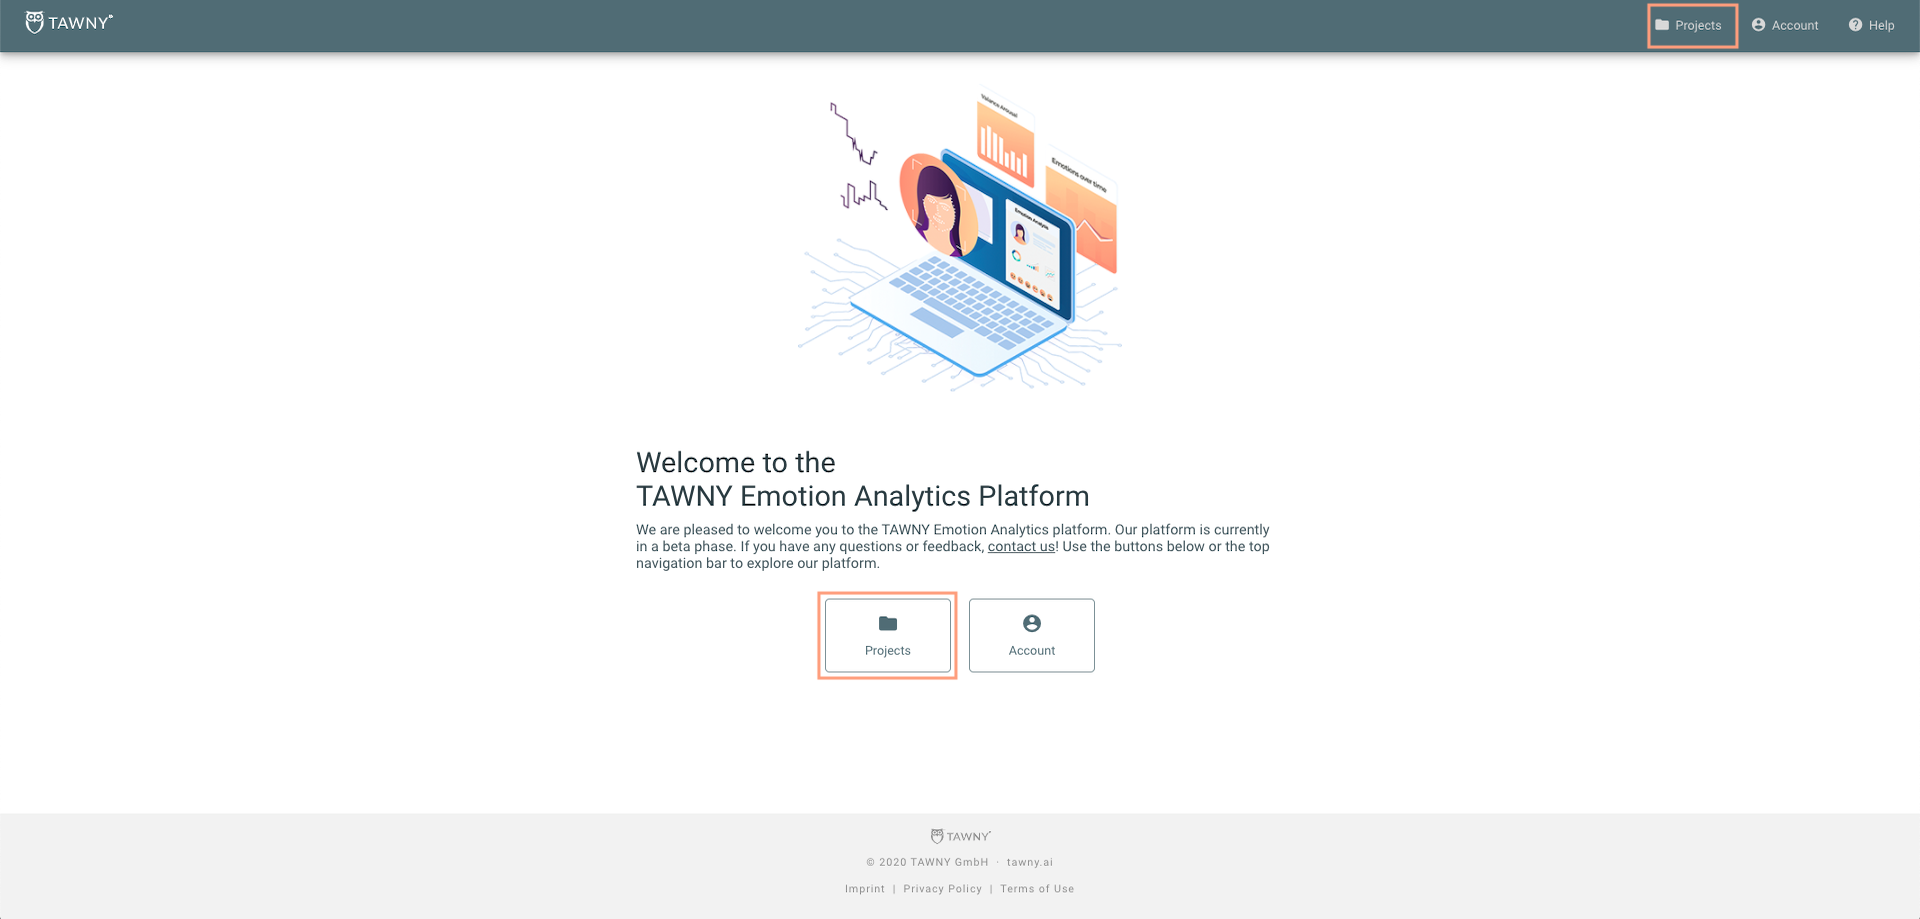
After logging in, you will be directed to the home page of your account. You can use the top navigation bar and the buttons in the bottom of the page to navigate around our platform.
Note about the different types of TAWNY accounts:
- Project owner: If you have a paid TAWNY account (project owner), you can start using our platform by creating a project.
- Collaborator: If you are invited by a project owner as a collaborator to work in joint projects, you will only be able to work on existing or past projects that you were invited to.
For more information on the capabilities of project owners vs. collaborators, click here.
# 2. Create a project
Let's start by creating a project.
Click on the “Projects” button in the navigation bar or in the “Projects” button at the bottom of the home page:
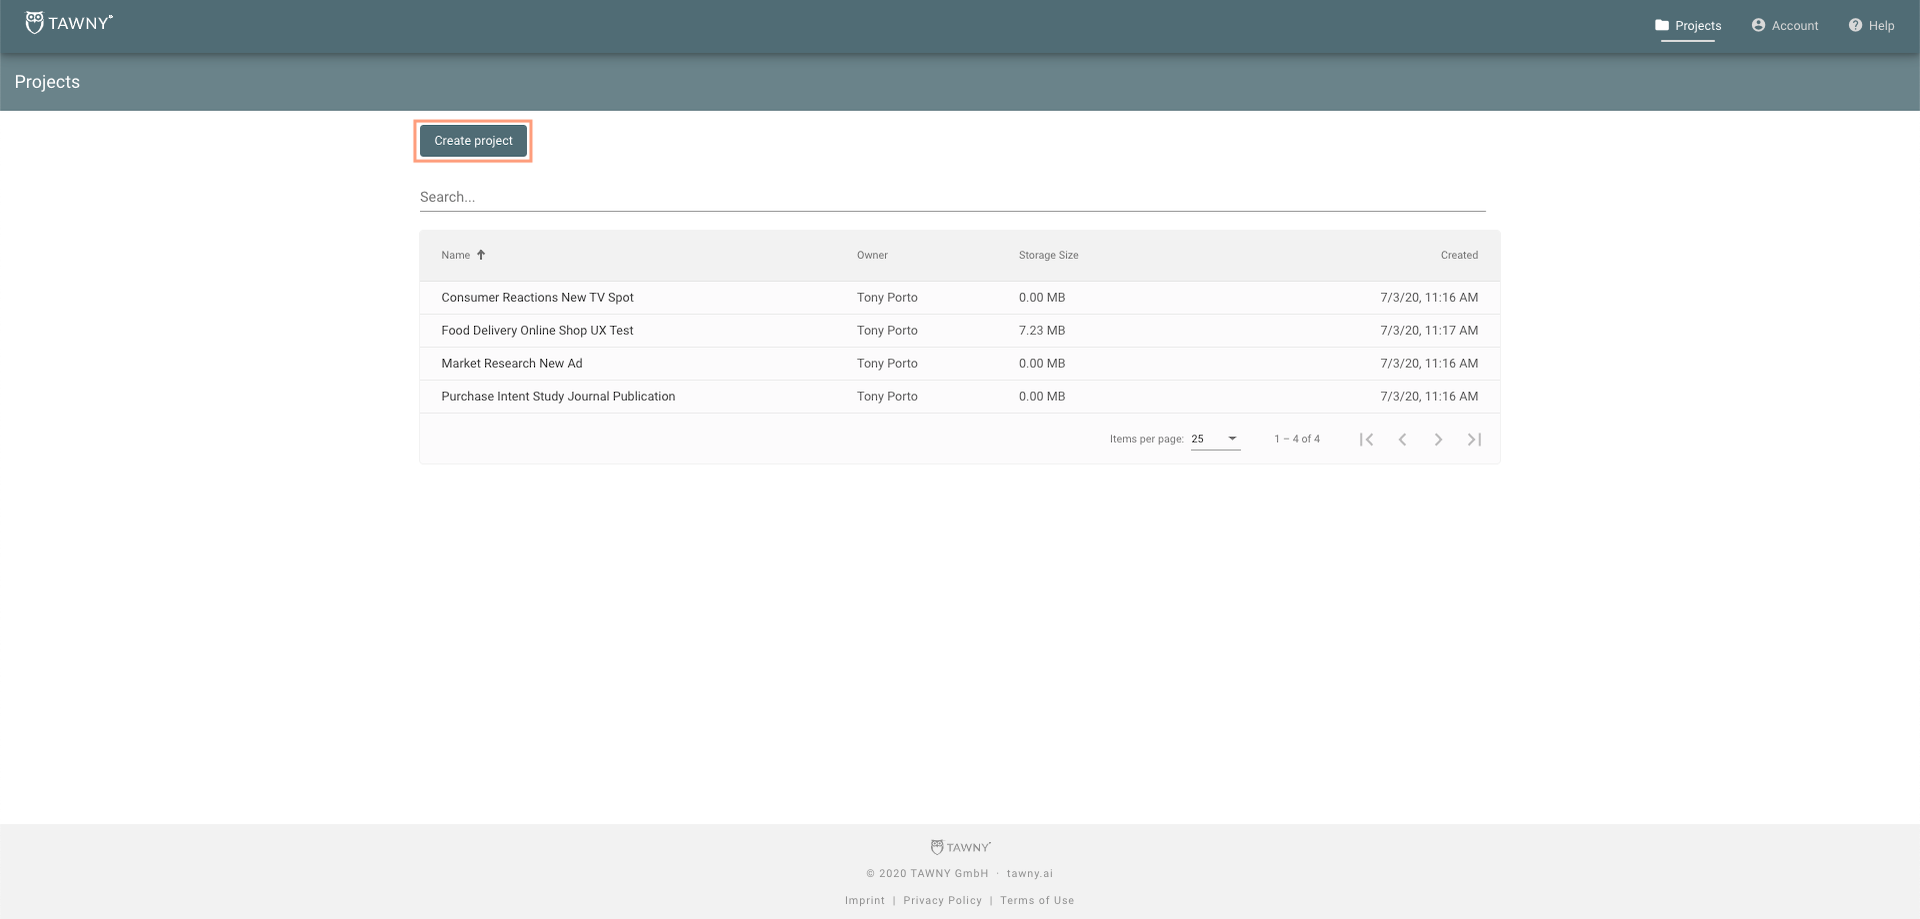
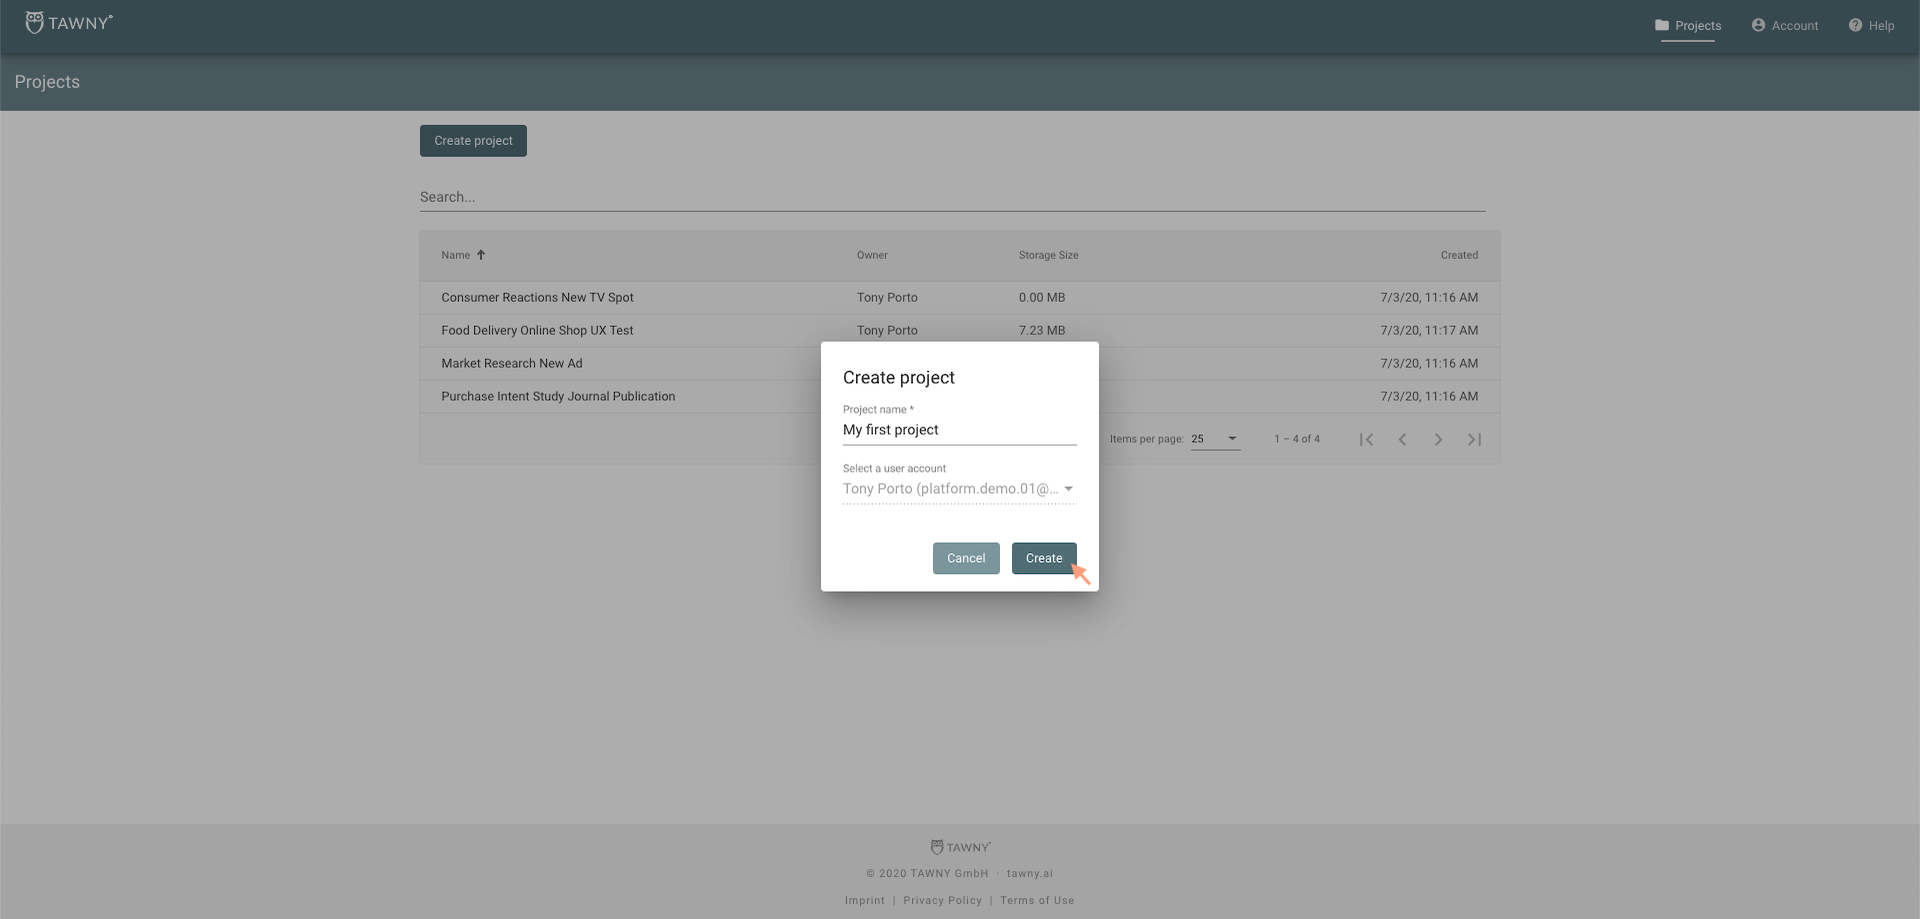
Once you are in the “Projects” section, click on “Create project”:
Give your project a name and select the owner account to which the project will belong to. Then click on “Save”:
Once a project is created, you can start uploading video recordings to analyze them with our Emotion Analytics Tools.
# 3. Record customer/user reactions
Our Emotion Analytics tools allow to analyze customers' or users' reactions to a certain stimulus. For that you need to record the user (subject recording) and the related content (stimulus recording).
TIP
Recording subject and stimulus videos and seeing them side-by-side, can help you better understand customer/user reaction. Make sure both videos are as synchronized as possible, so it is easier for you to analyze customer/user emotions.
You can record own videos using for example a camera, webcam or smartphone. We also offer an integrated recording solution. Currently, it is not directly available on the platform, but feel free to contact us (opens new window) in case you need our recording tool for your study. For optimal analysis, please take into account the following guidelines for video recordings.
# Recording guidelines
No matter if you record subjects yourself or if you use existing recordings, the quality of our emotion analytics output strongly depends on the input quality. So please read the following guidelines and consider them when preparing recordings.
- The subject’s face should be centered and visible (distance of 1-3 meters).
- The subject should ideally always look into the camera frontally.
- The subject’s face has to be properly lit. Avoid recording the video in backlight.
- Try to record against a plain wall background and avoid patterns or prints.
- To avoid detection gaps, ask your subjects to keep their hands off their faces as much as possible.
- Video resolution should at least be 640x480 pixels.
- Video size must not exceed 1.5 GB.
- Supported video formats: .mpeg, .mpg, .mpe, .mp4, .ogg, .ogv, .qt, .mov, .webm, .asf, .avi, .m4v
# 4. Upload recordings
Once you have subject and stimuli recordings that align with our recording guidelines, you can upload them to our platform:
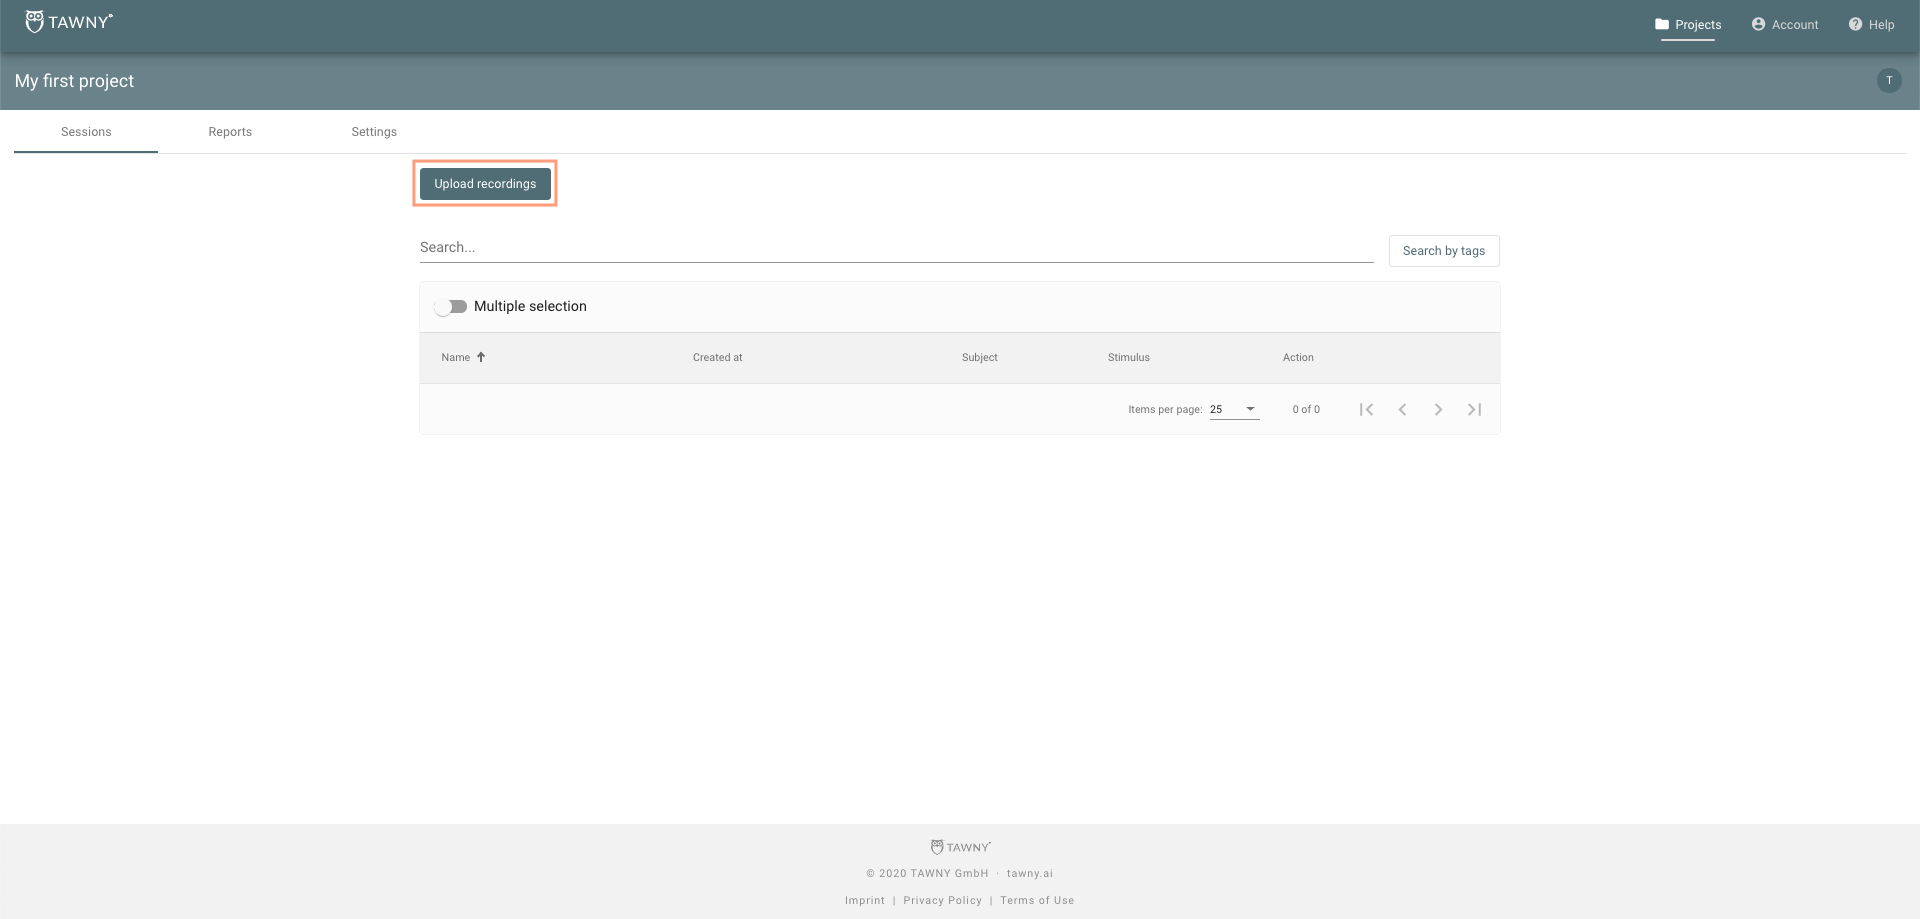
In the “Projects” section, click on the name of the project where you want to upload the videos. Inside the project click on “Upload recordings”. You can upload one or multiple videos at once:
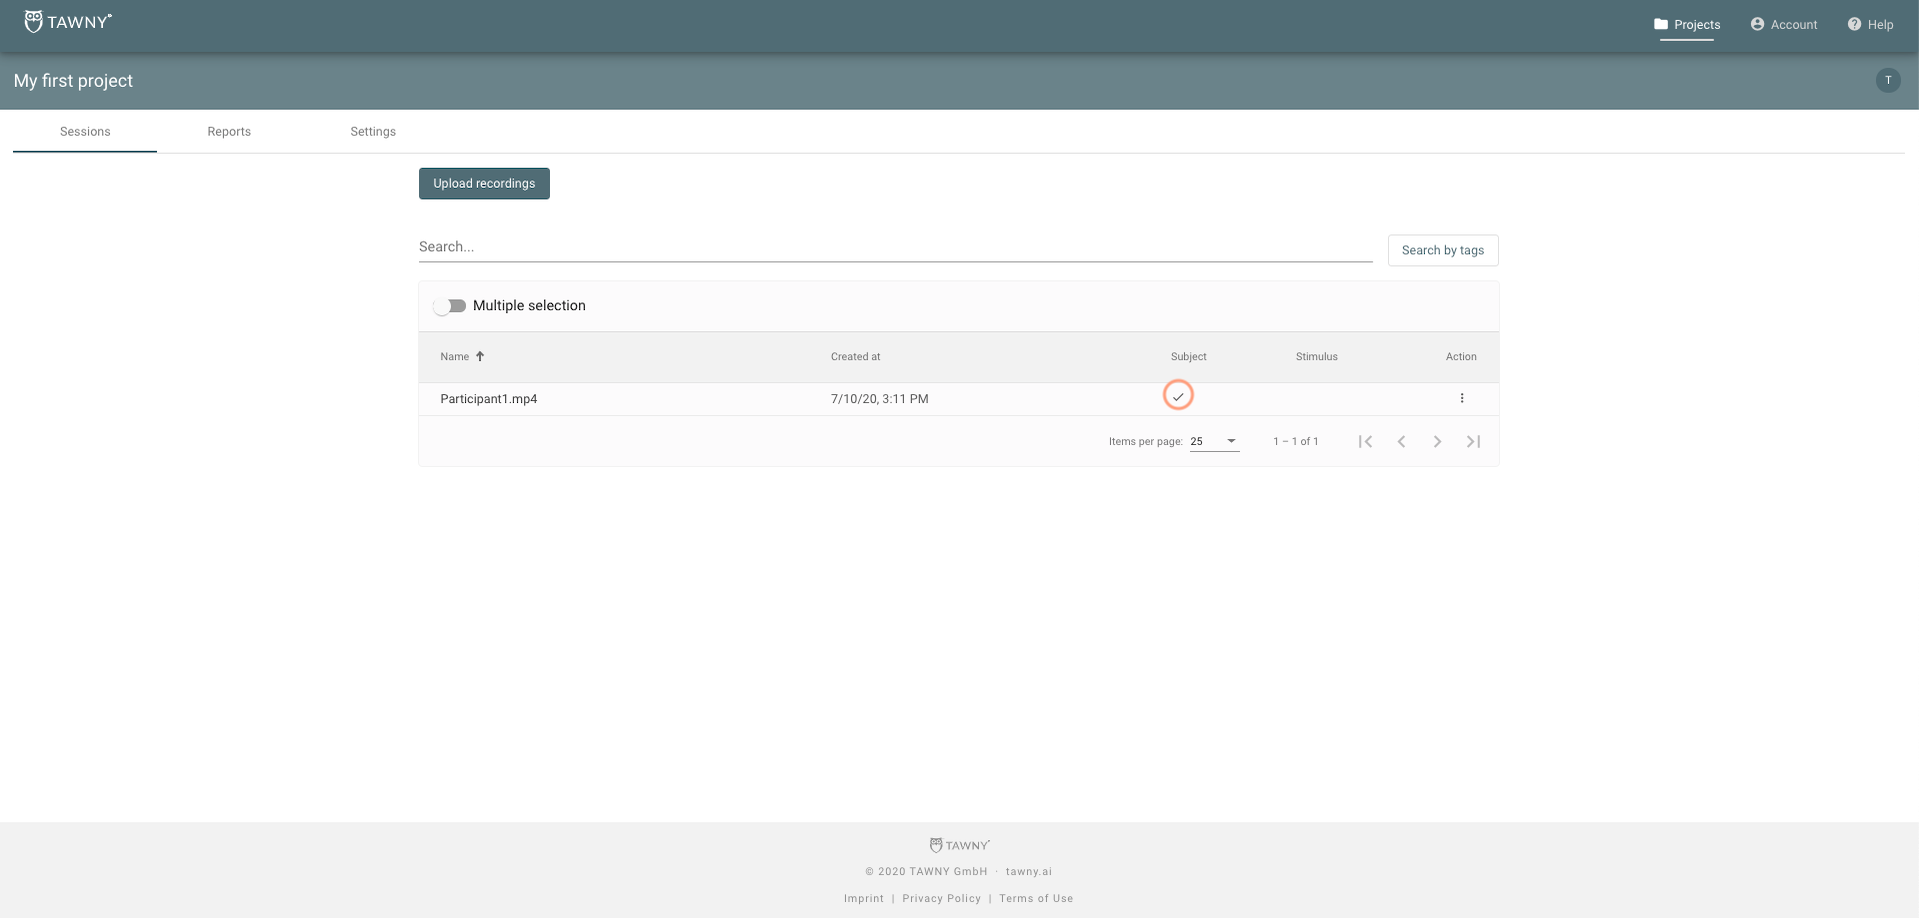
Select the subject video file(s) from your device and click “Open”. Wait until the video is fully uploaded (when it is ready you will see a checkmark under the column “Subject”):
If you have a stimulus video, you can upload it next to see it side by side to your Subject Video:
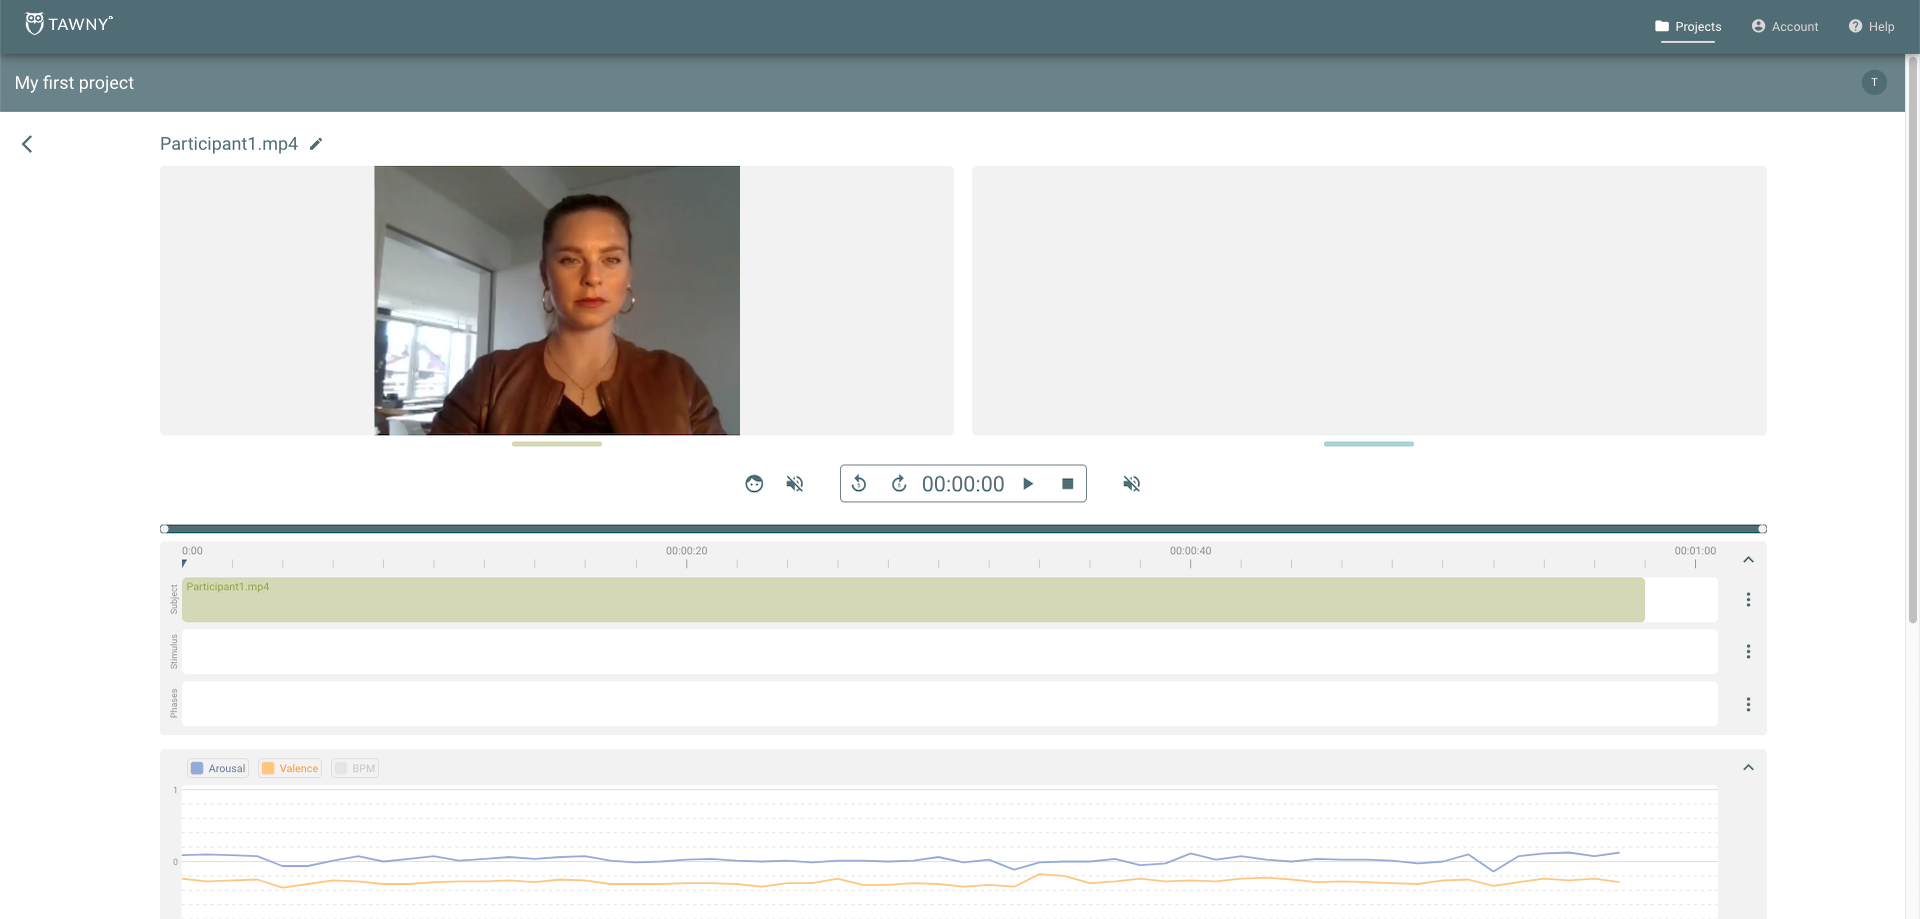
Click directly on the name of the subject video you just uploaded. The analysis screen for this video will open:
To upload the stimulus video, scroll down below to the “Stimulus timeline” and click on the “Menu” option (three dots) on the right. Next, click on “Add” in the pop-up menu:
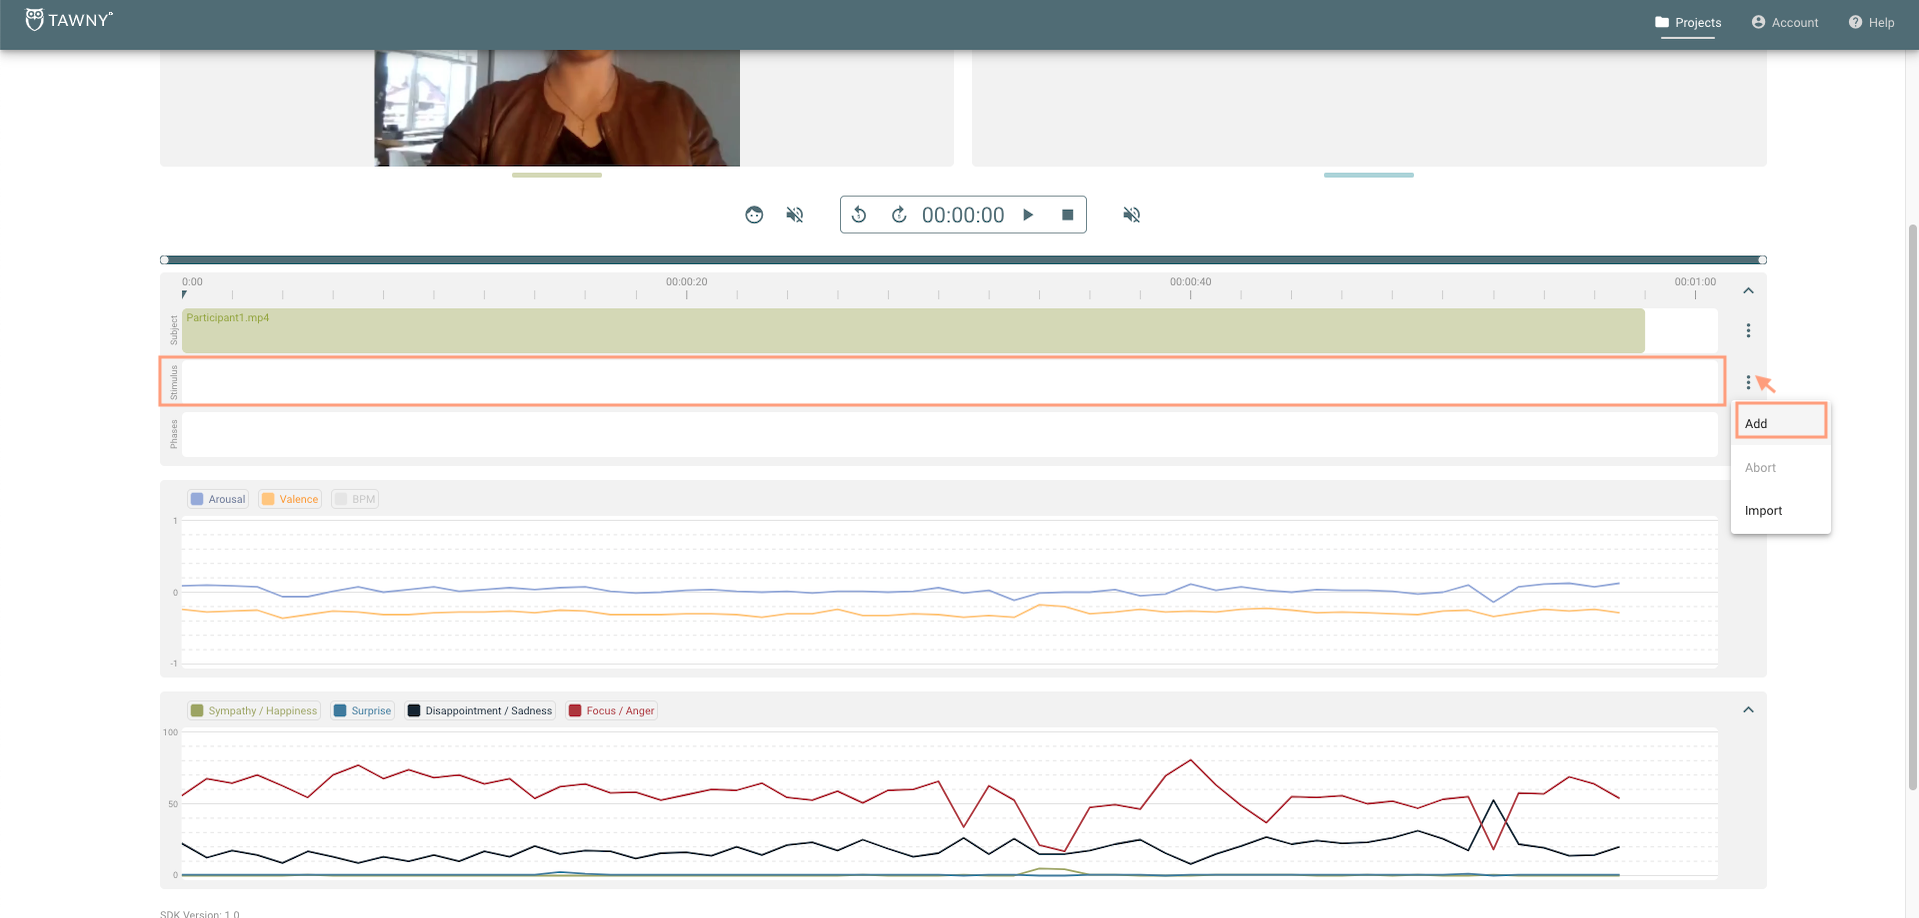
Select the file of stimulus video from your device and click on “Open”. Wait until the video is fully uploaded. Once it is ready, it will appear on the “Stimulus timeline” and also displayed next to your subject video:
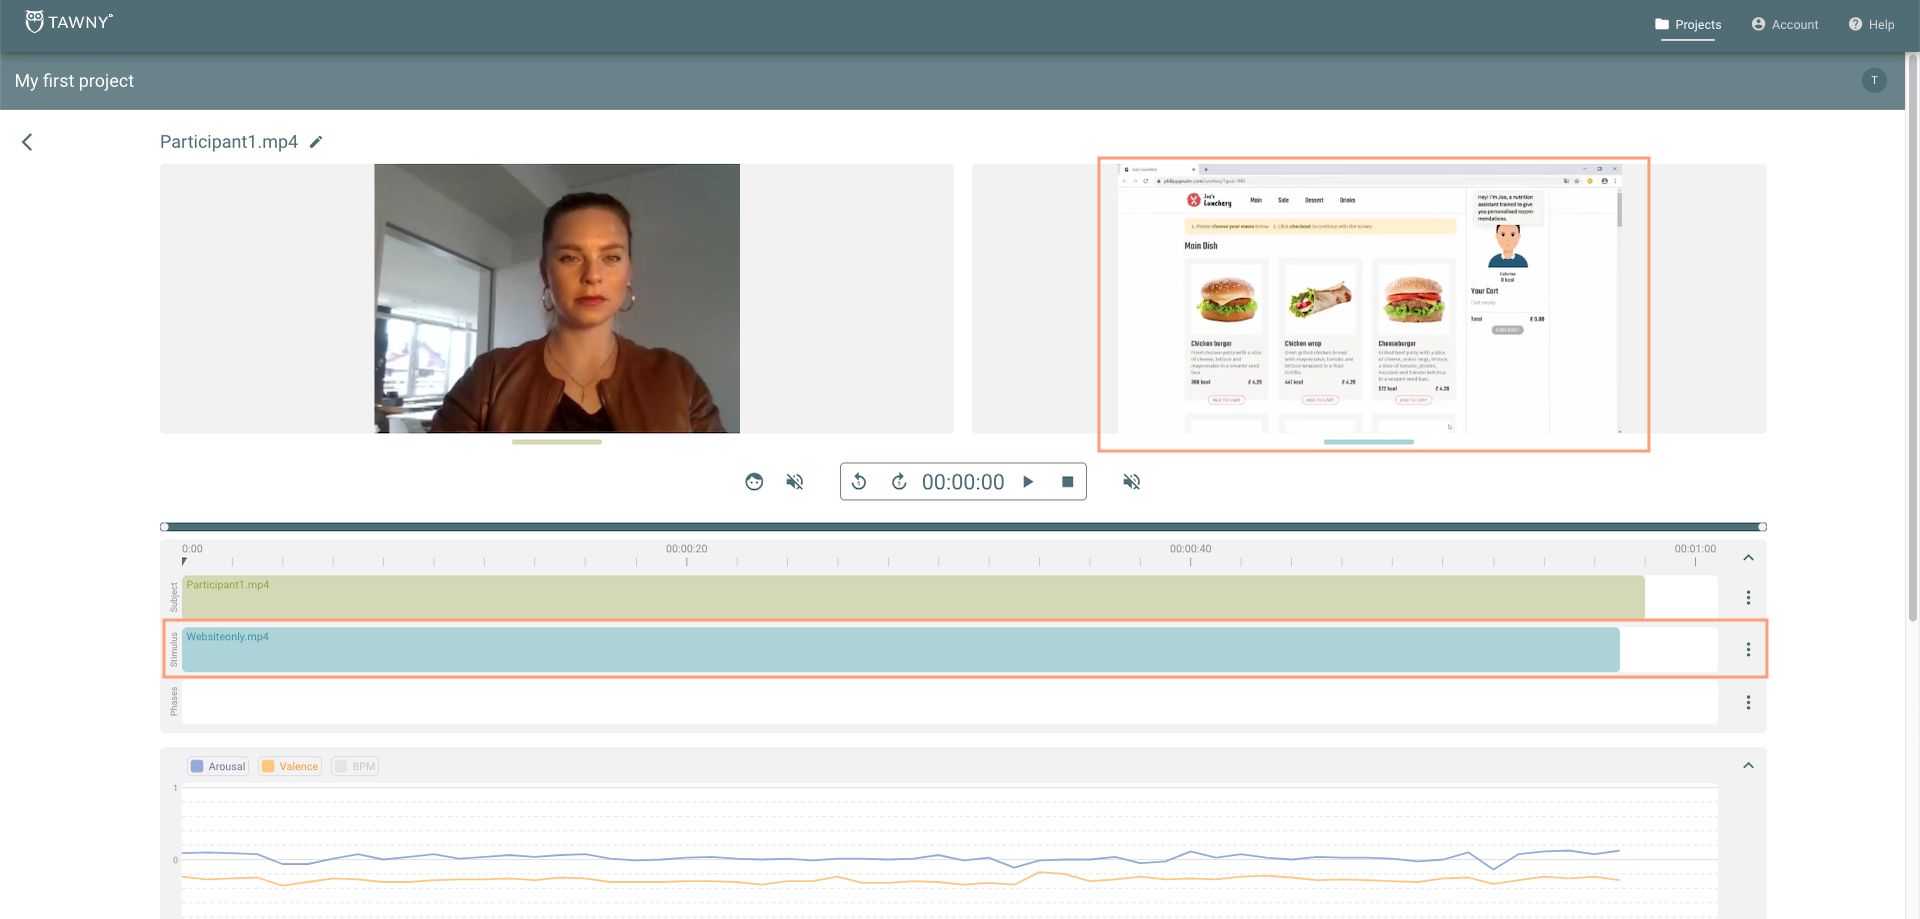
Now both videos are uploaded and they are automatically saved together! You can begin to analyze your customers’ reactions with our Emotion Analytics Tools.
# 5. Emotion Analytics
You can use our Emotion Analytics tools in many different ways, depending on the objectives of your project. However, we would like to give you some tips on how to get started.
# Playback
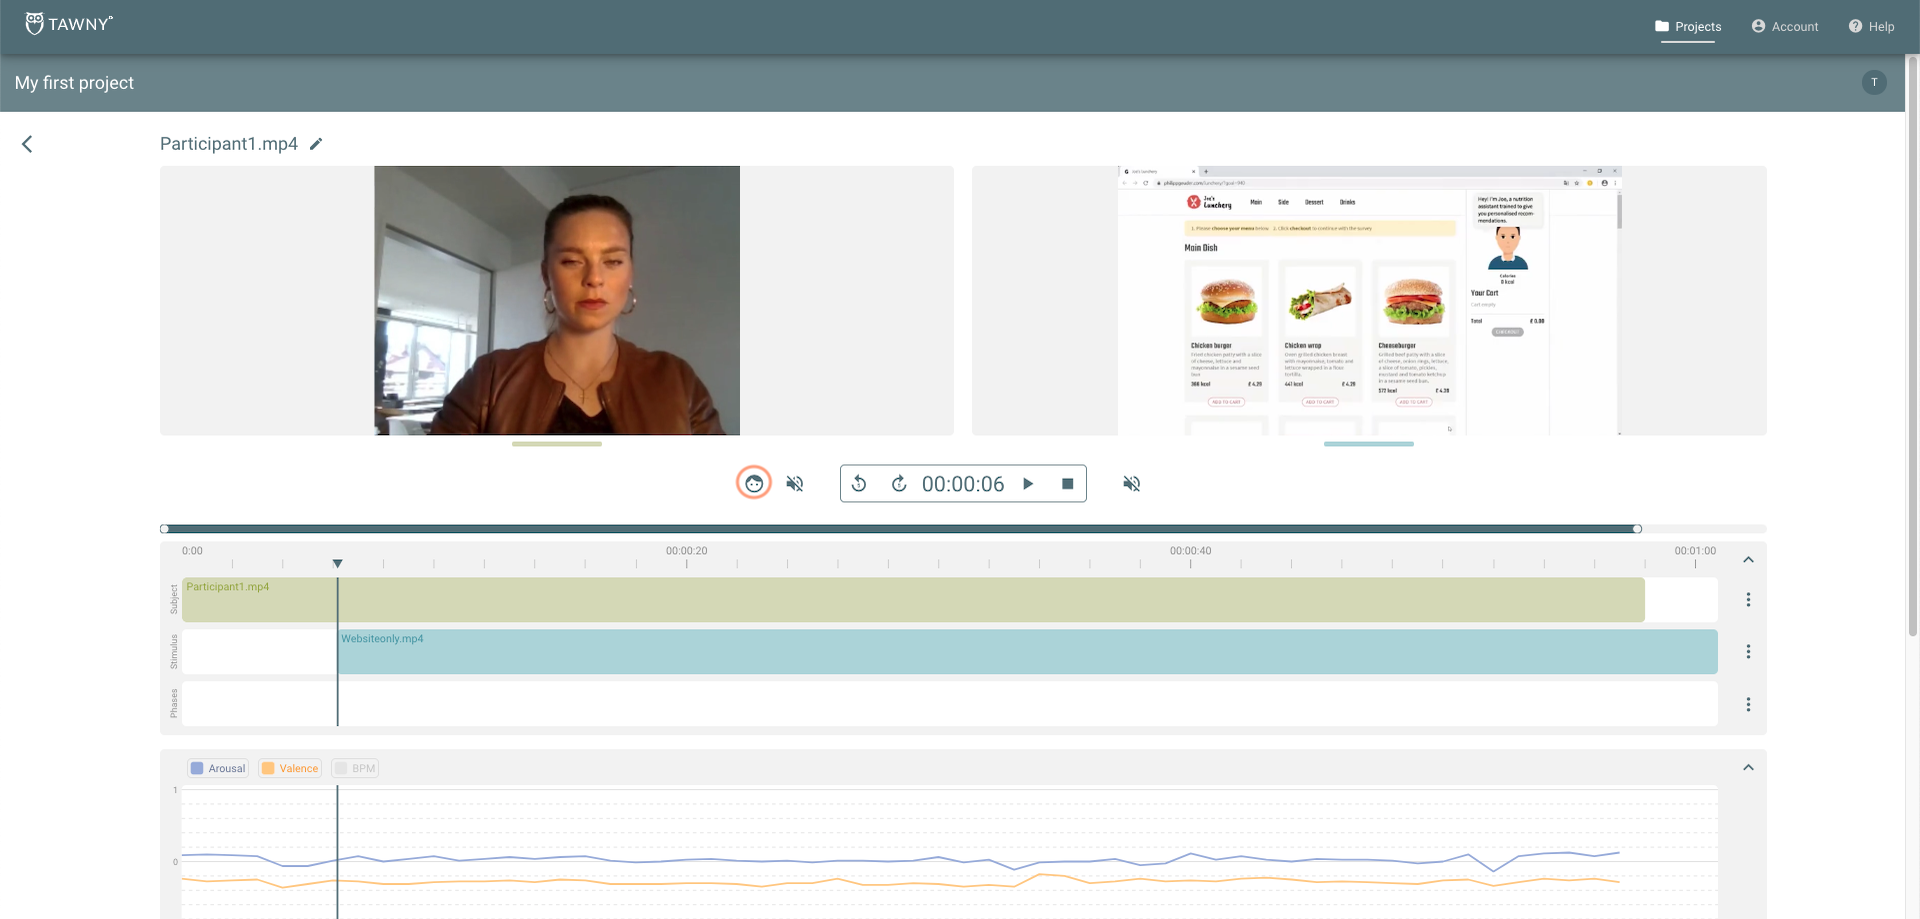
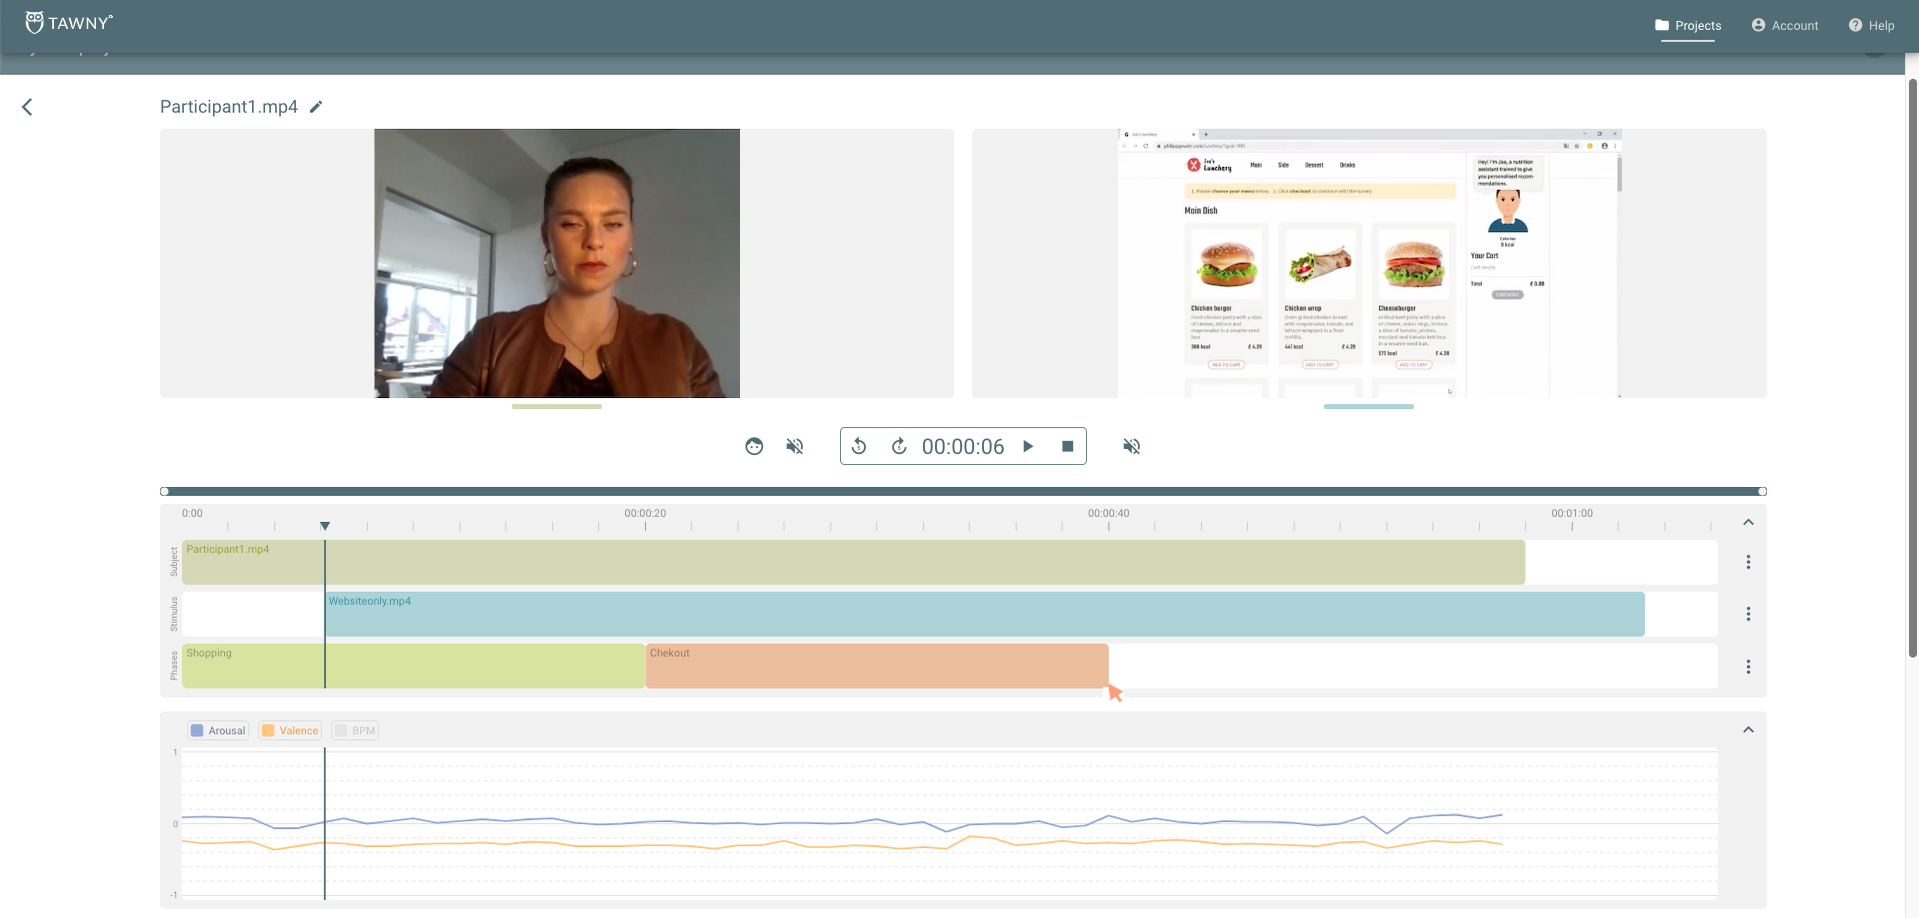
You can click on the “Play” or “Stop” buttons to see both videos simultaneously. The “Rewind” and “Forward” buttons can help you to return or skip to important parts of the video. You can also drag the small arrow above the “Subject Timeline” to move around the video:
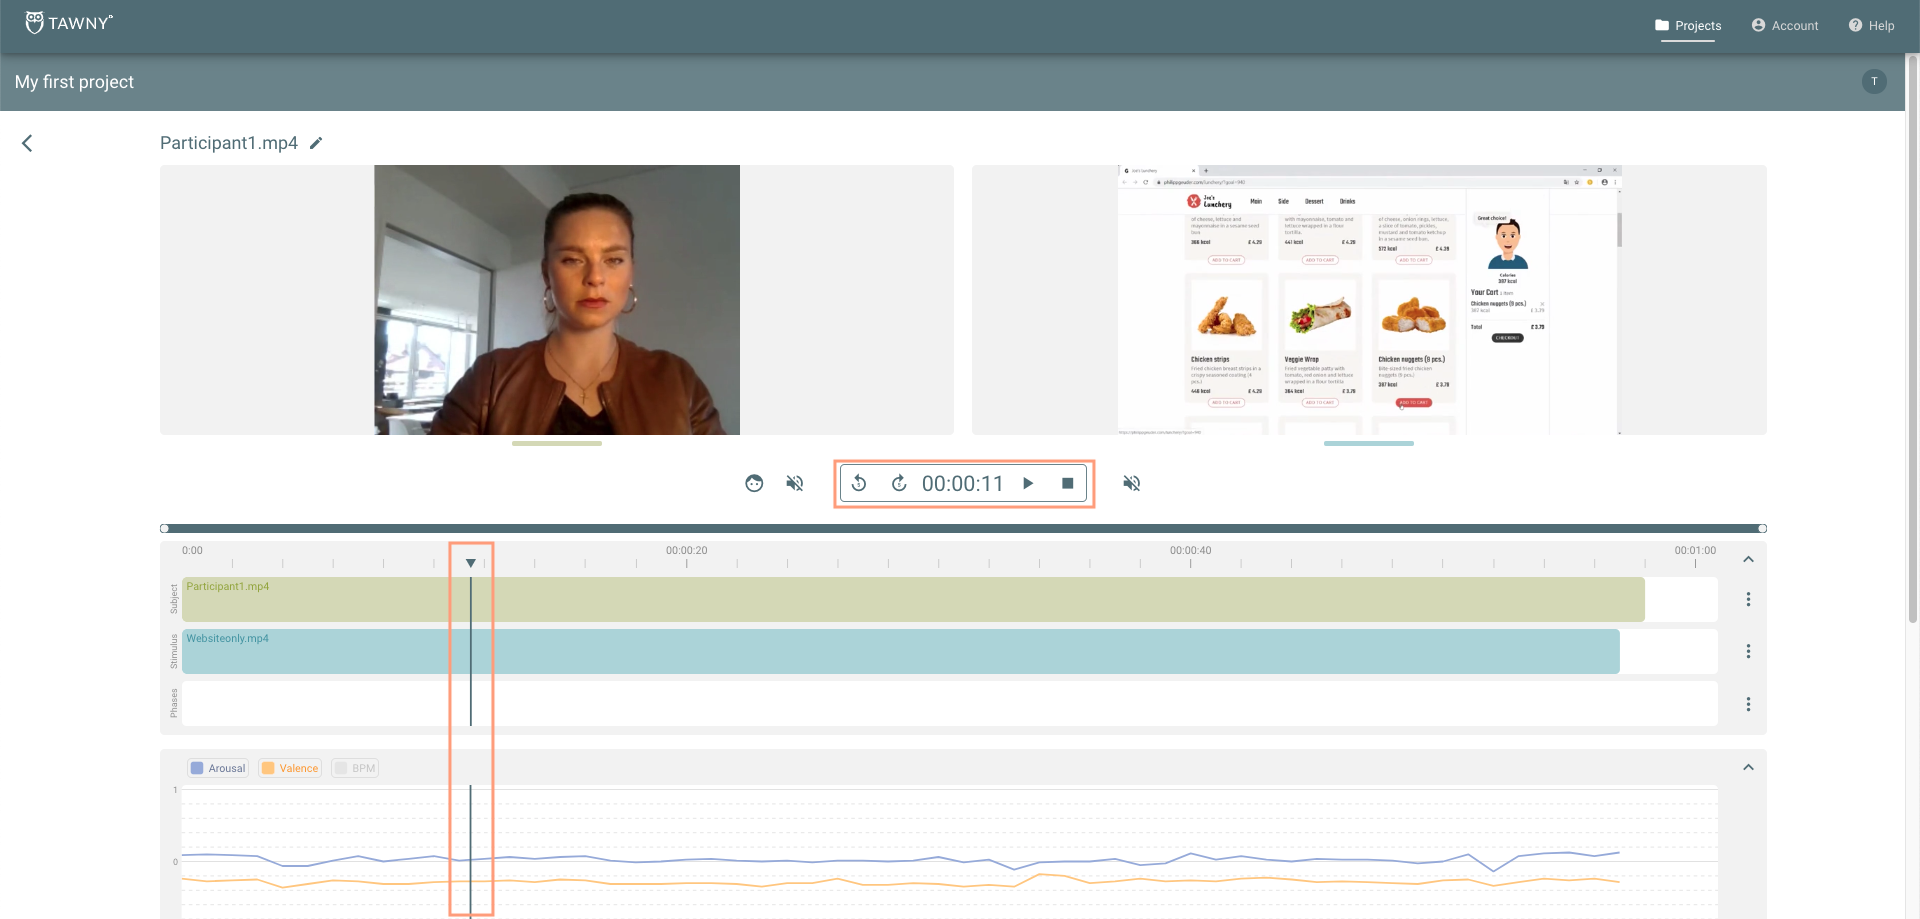
You can mute or unmute each video individually by clicking on the respective “Sound” button beneath.

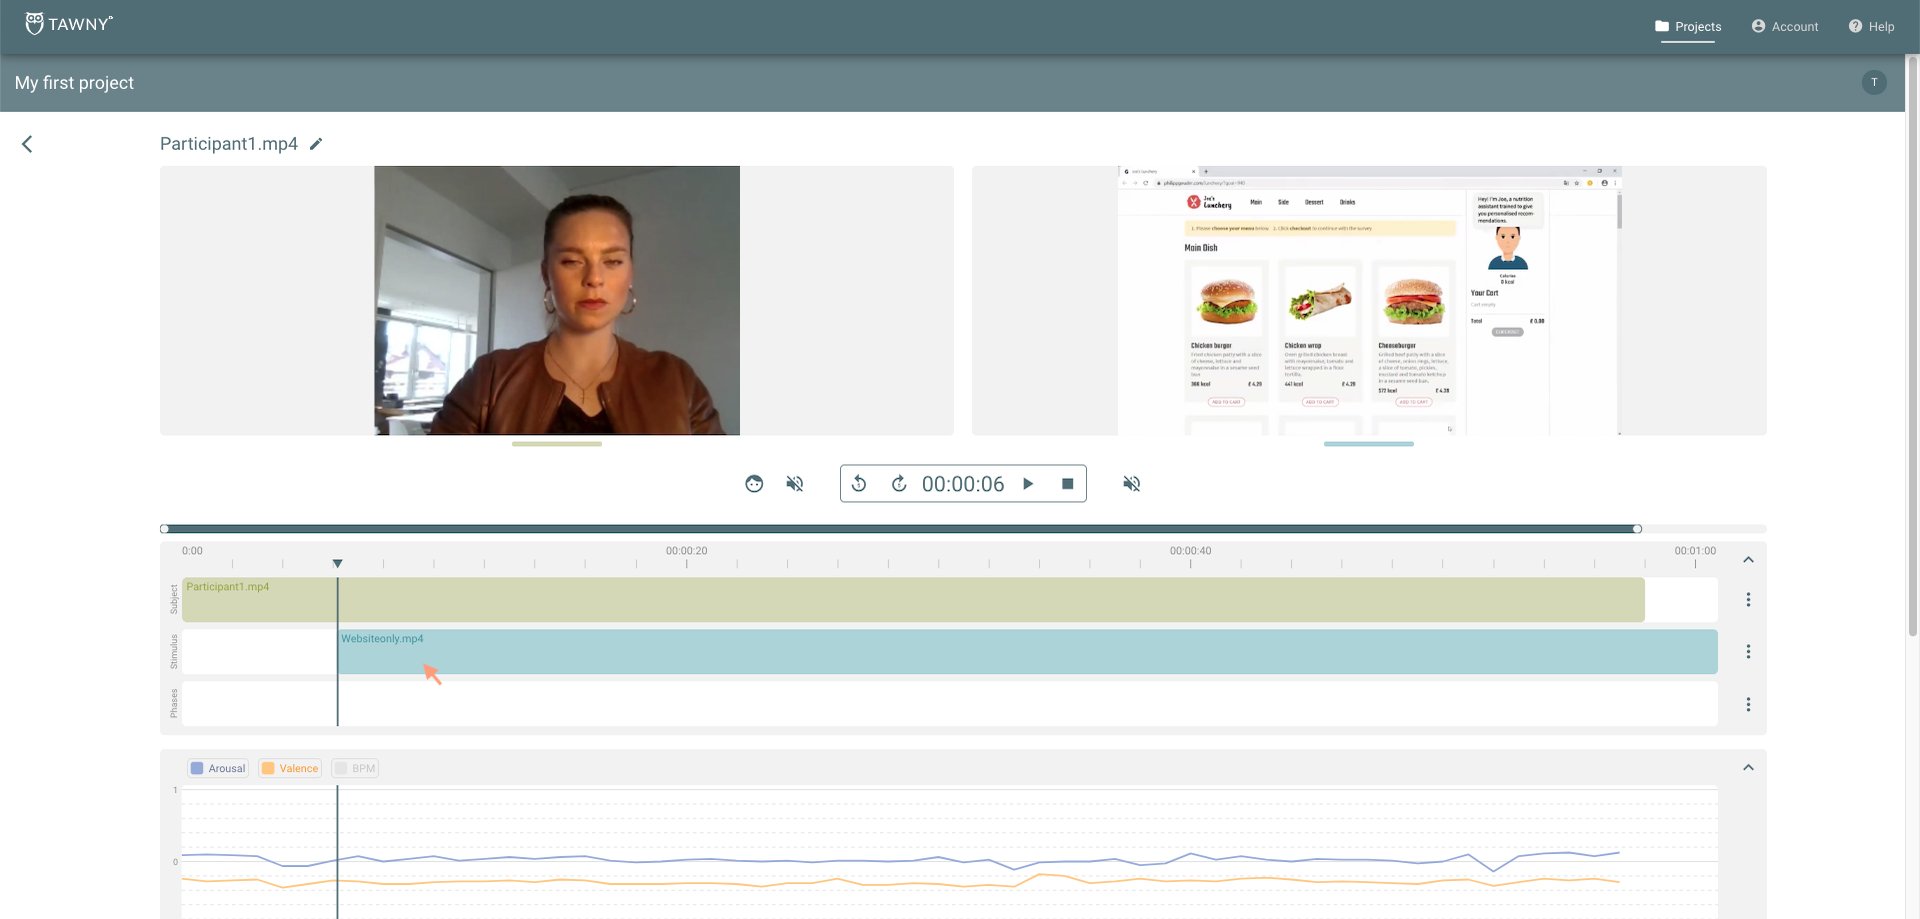
Make sure that your subject video is synchronized with your stimulus video. If you have recorded both videos with separate cameras, it is important that the actions on the stimulus video are happening at the same time as the reactions in your subject video. To do this, you can simply drag either of the video tracks in the green subject timeline or in the blue stimulus timeline until they are both in sync:
# Multiple Detected Persons
Depending on use case and composition of the uploaded subject recording, more than one person may be detected in a video. To manage multiple detected persons, use the "Face" button, located left to the playback controls.
The "Select subject" popup shows a thumbnail image for each recognized subject. If there are multiple subject thumbnails, select one of them to load the respective emotion analytics data.
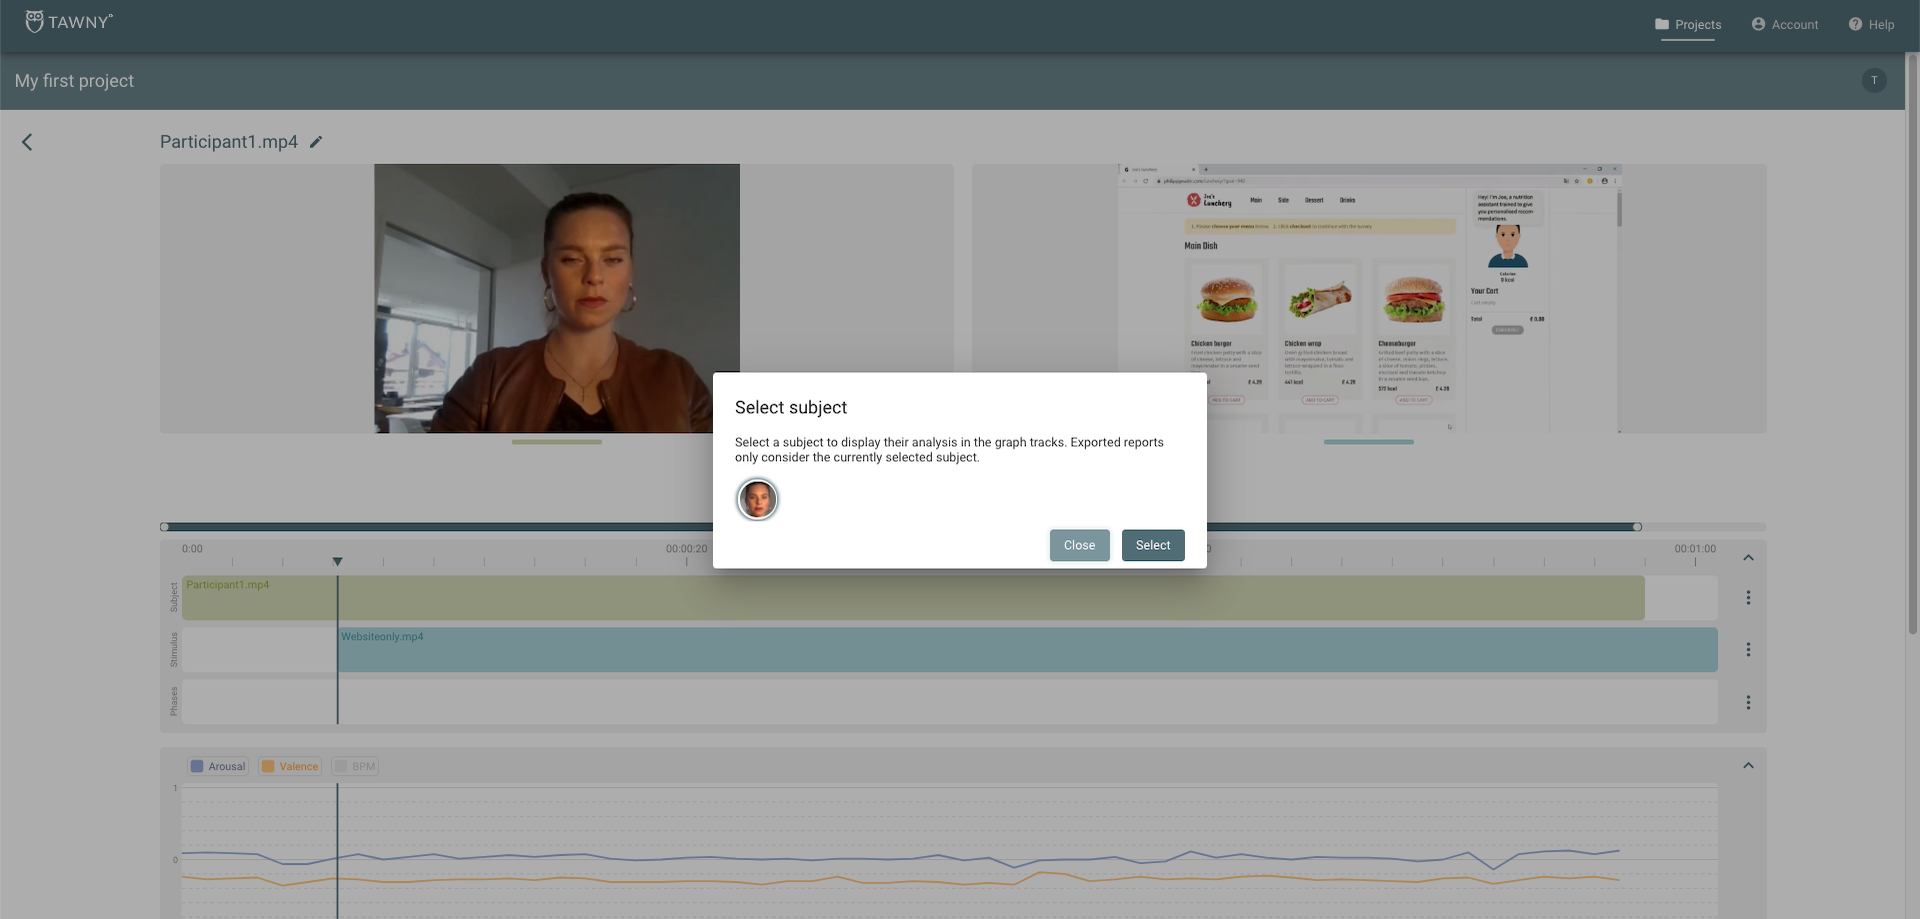
Hard cuts, different perspectives or changing lighting in a video may result in incorrect subject detection:
- a person is mistakenly recognized as several different people. In that case, you can use the "Merge Option" in the "Selection" popup to merge multiple subjects to one.
- different people are mistakenly recognized as the same person. Currently there is no option to split an analysis. Please follow our recording guidelines for making recordings to avoid mistakes.
TIP
If there are gaps in the analysis graphs although a subject is visible, have a look at the video quality and and open the "Select subject" popup to check if at this point another person was detected.
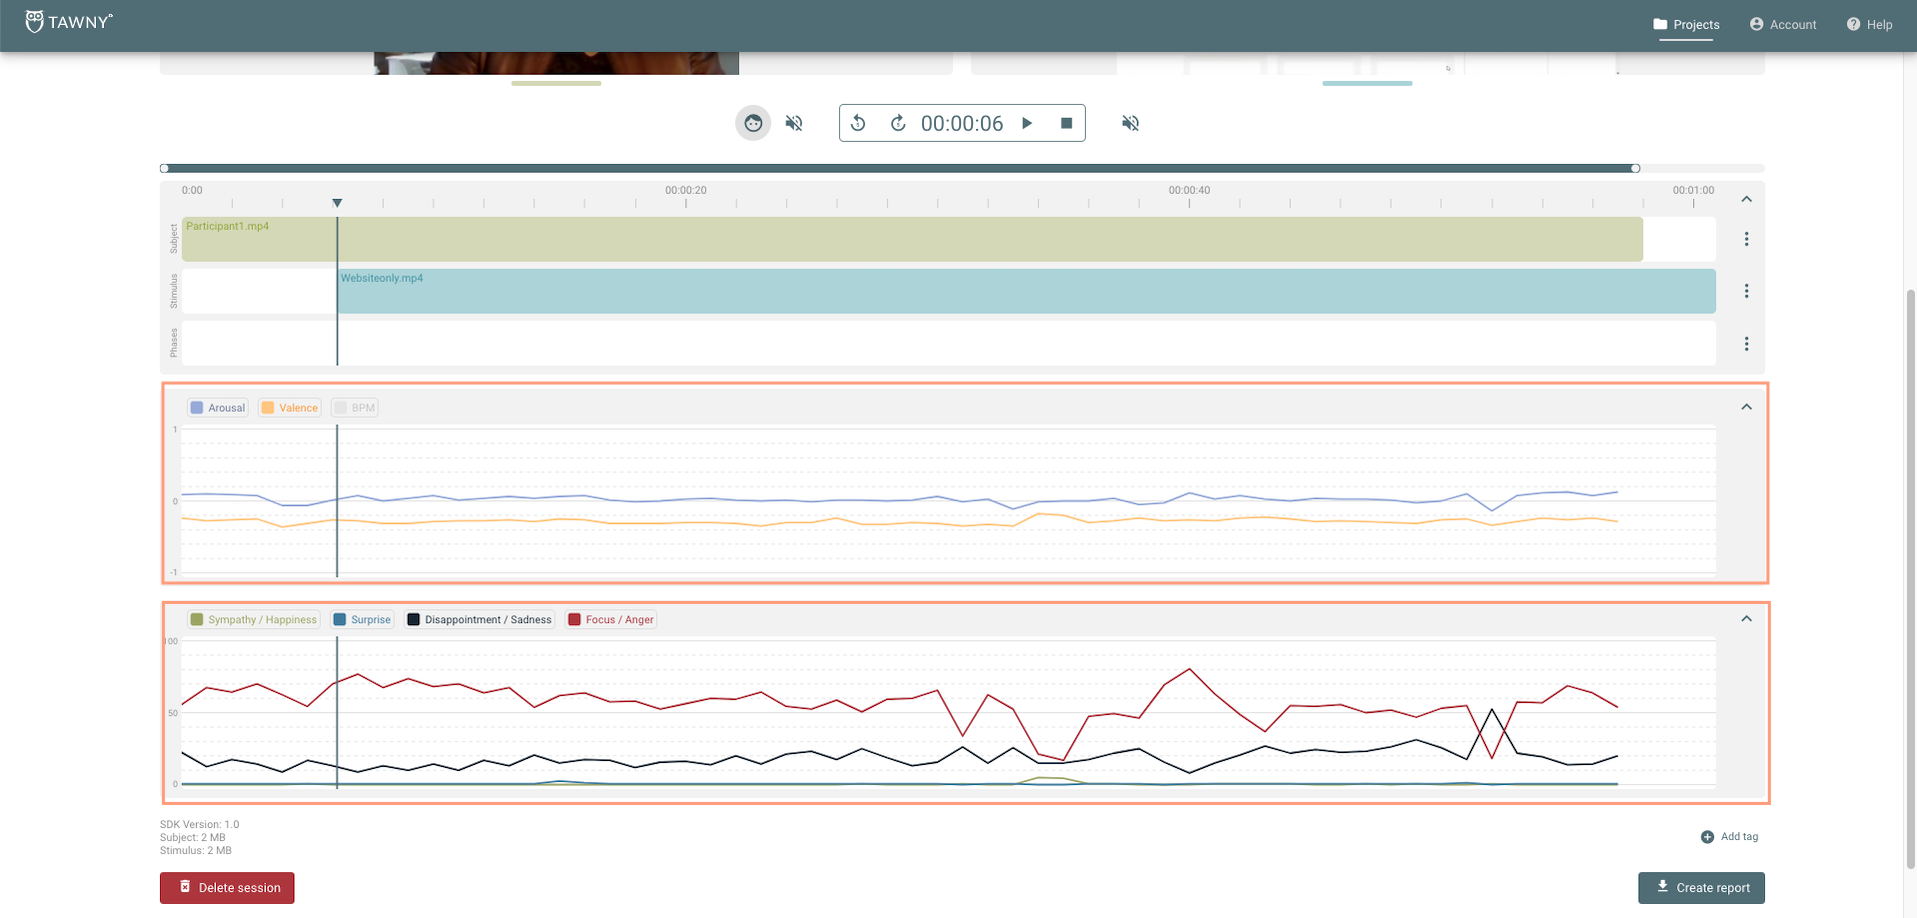
# Emotion Analytics
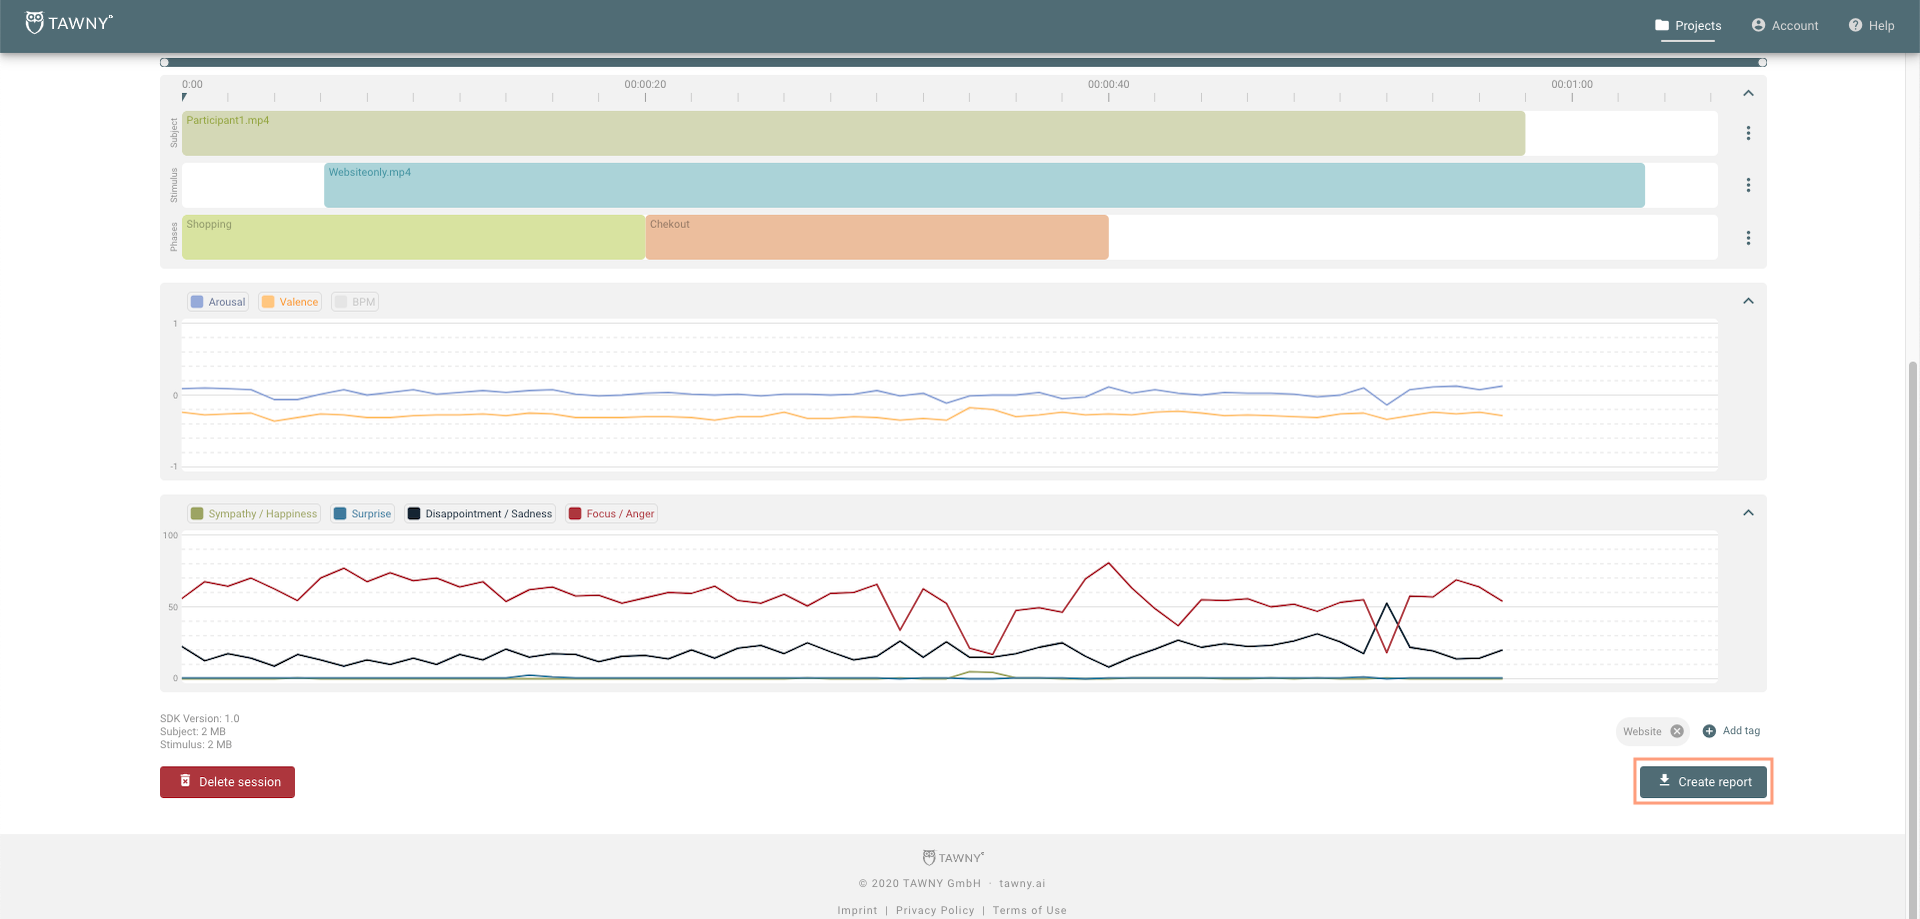
The “Valence/Arousal graph” shows the level the valence (how positive/negative) and the arousal (how relaxed/excited) of the subject in the video throughout time. The “Emotion Category graph” shows the probability that the subject in the video is displaying one of the four emotion categories (Sympathy/Happiness, Surprise, Focus/Anger, Disappointment/Sadness) at a given time.
For more information on these emotional dimensions please have a look at Understanding Emotion Analytics.
If you have a lot of videos in a project, you can create Tags for each video to group them into specific categories. You can later use the Tags to search through your videos and create customized reports.
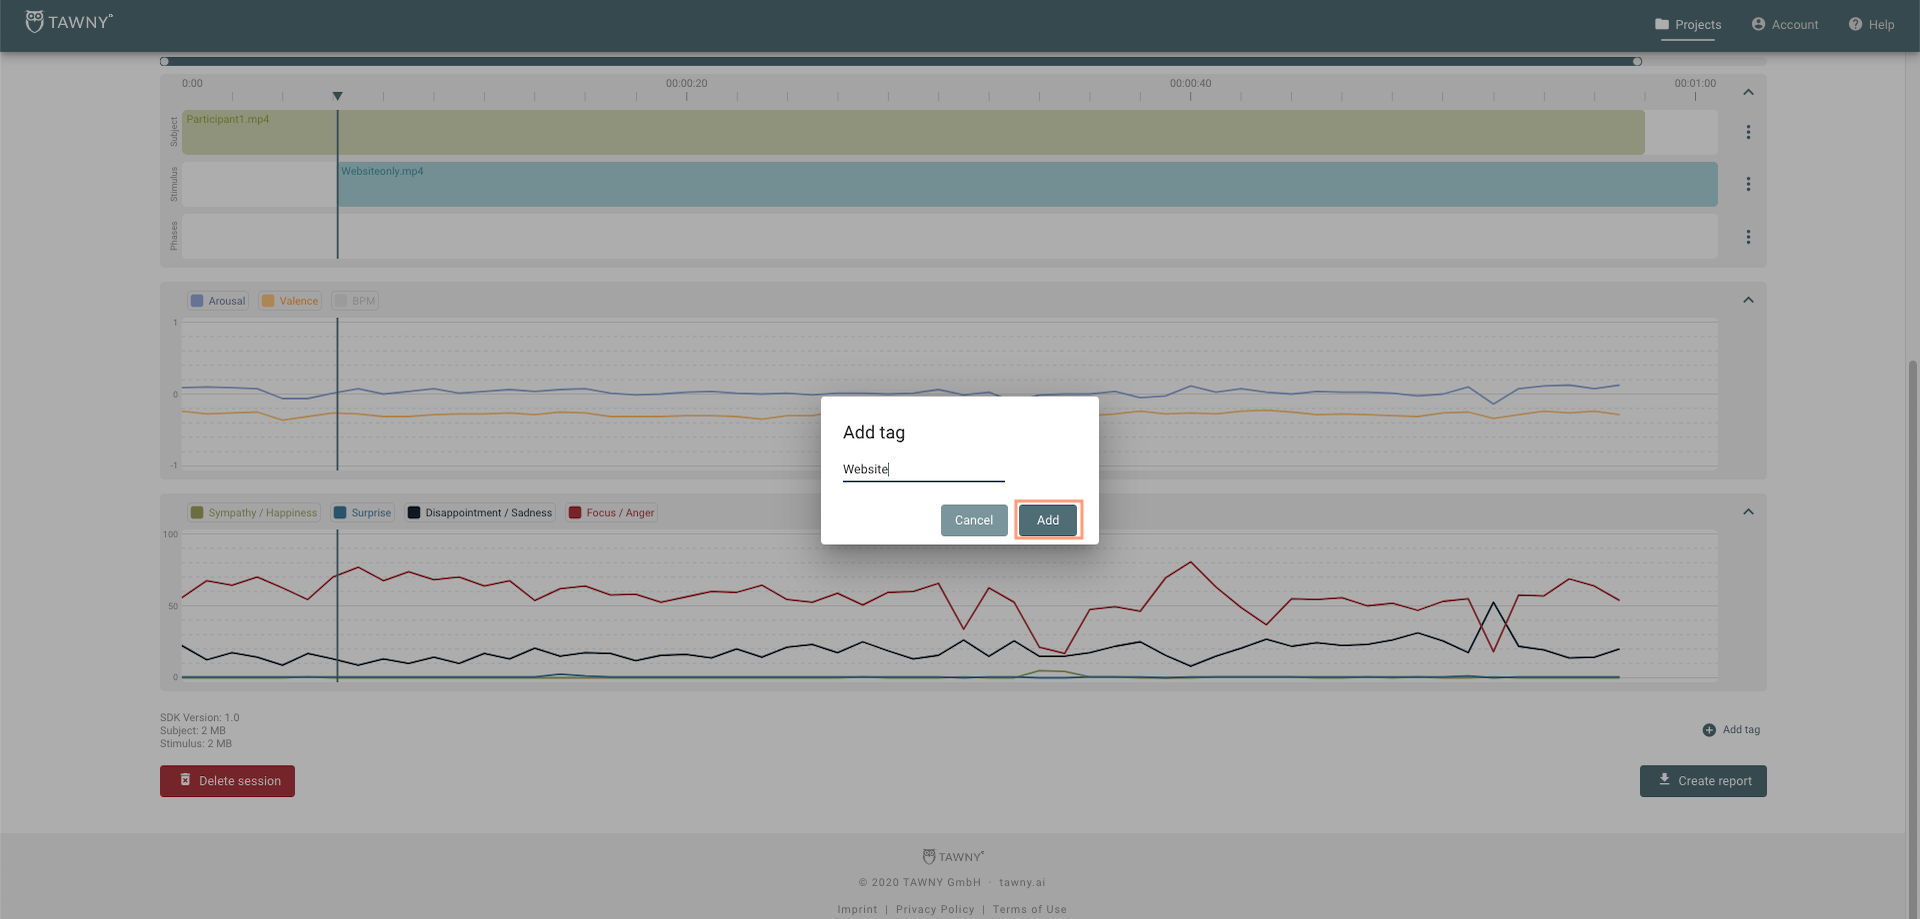
To create a Tag, click on “Add tag” at the bottom of the “Analysis screen”.
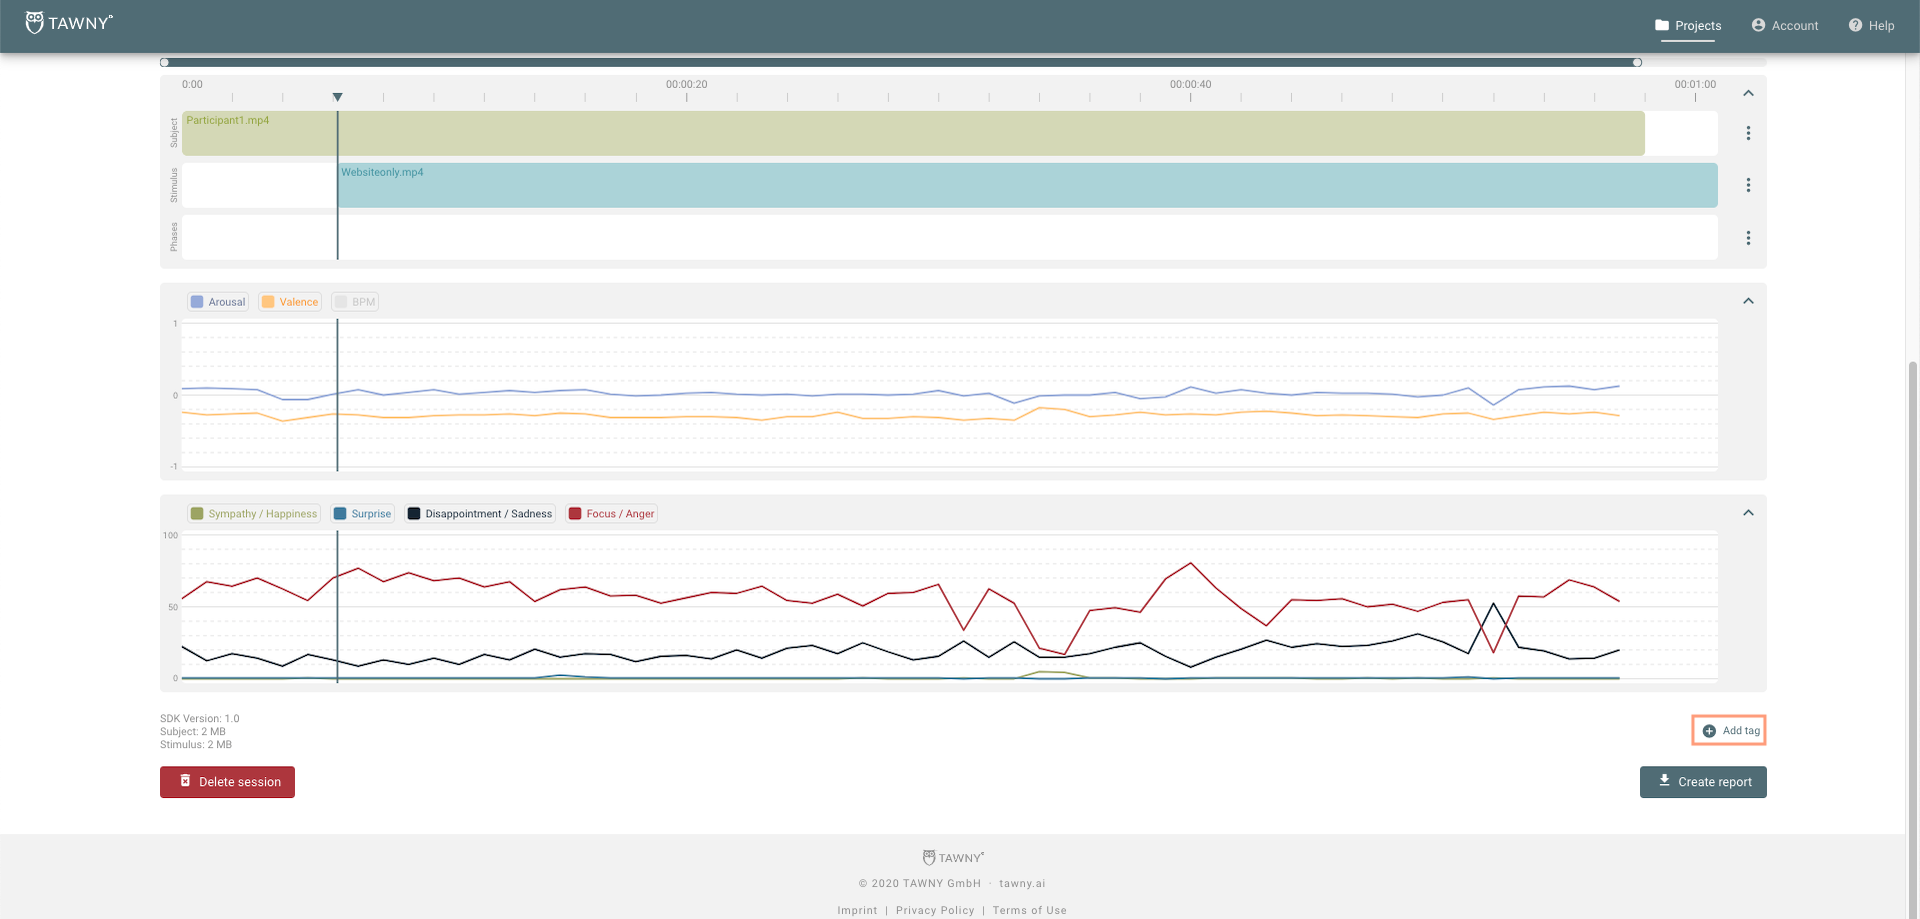
Type the name for your Tag and click “Add”:
# 6. Session Annotation
We recommend you to annotate your videos using Phases.
In most cases, your subjects can be performing different tasks and their emotional responses can differ. By creating specific Phases related to the task they are doing, you can obtain a more refined analysis when you generate a report:
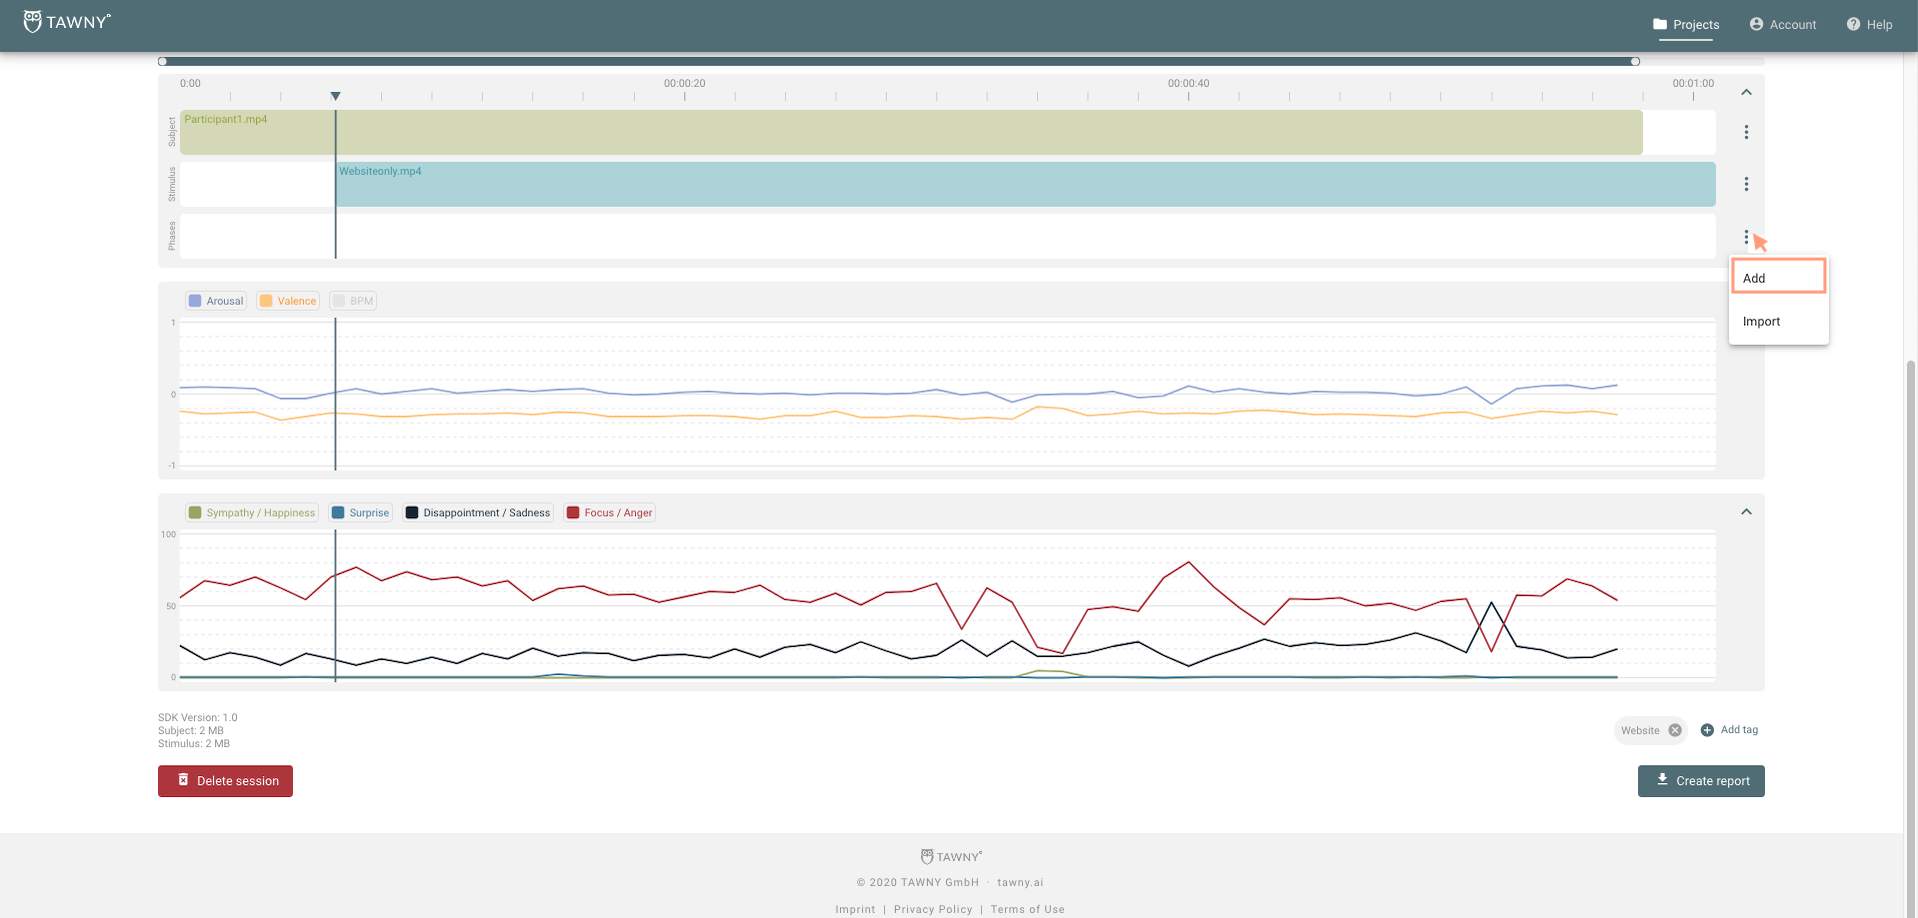
Go to the “Phases timeline” and click on the “Menu” option on the right. Then click on “Add”:
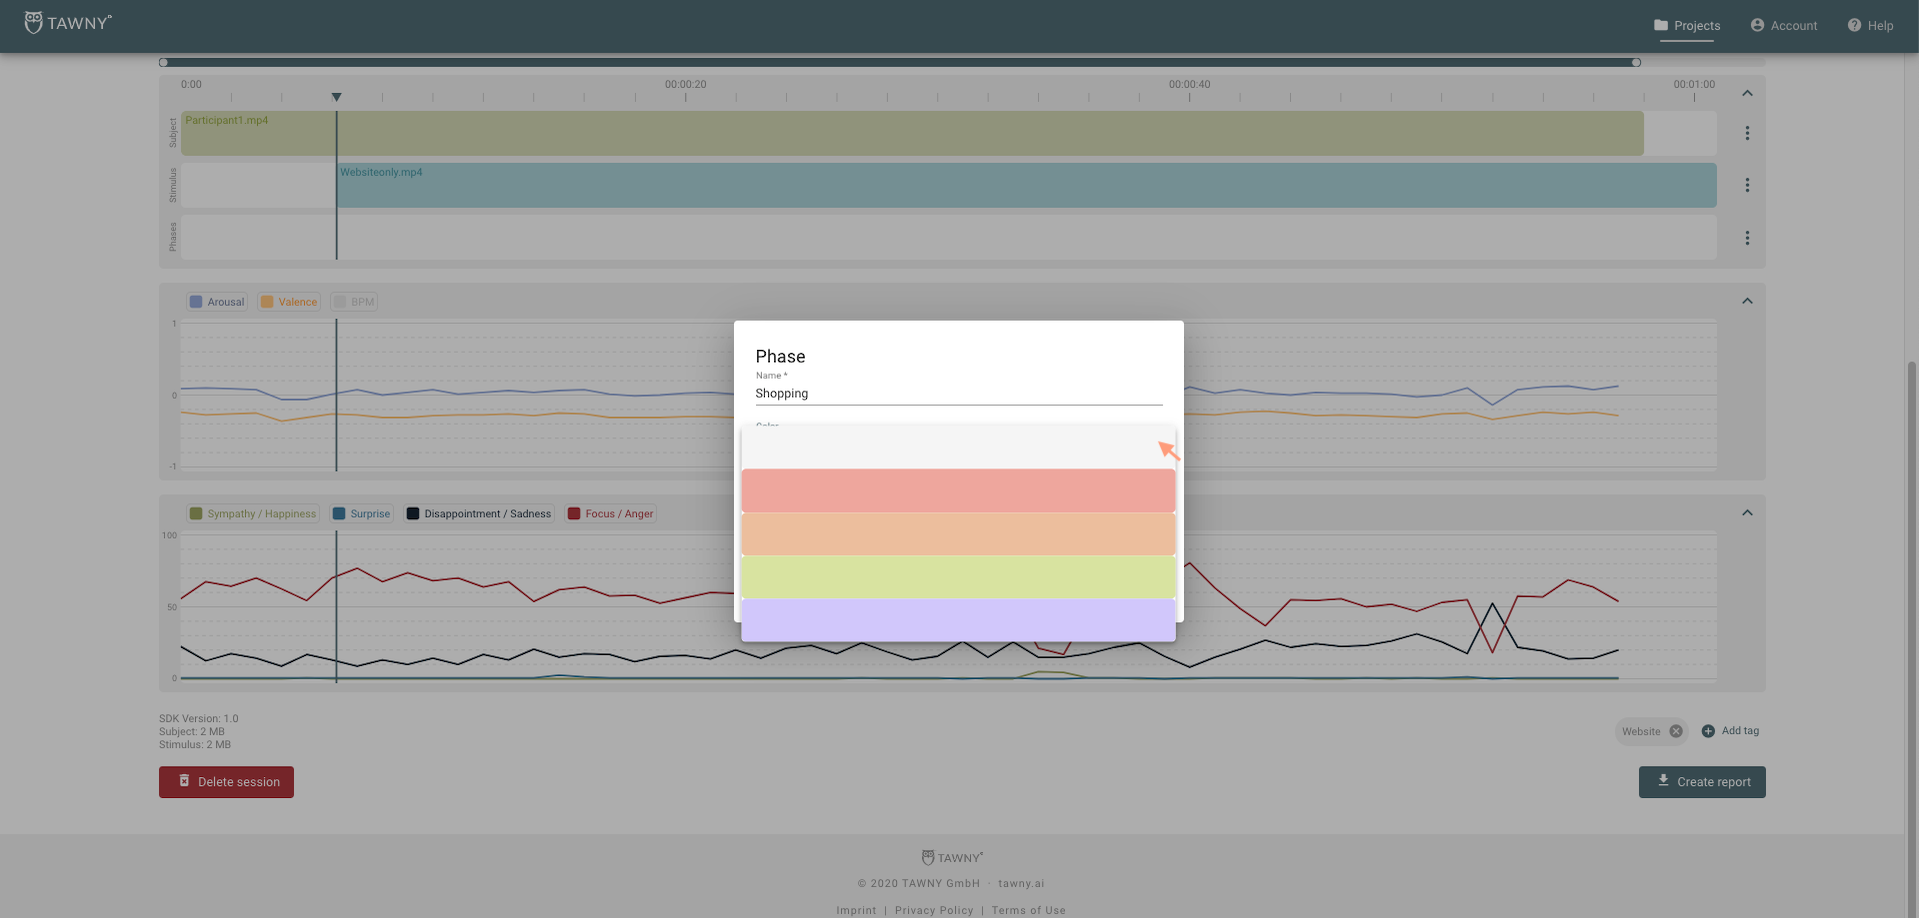
In the “Phase window”, type the name of the phase you would like to create. You can also add a distinctive color from the drop-down menu to easily identify specific phases.
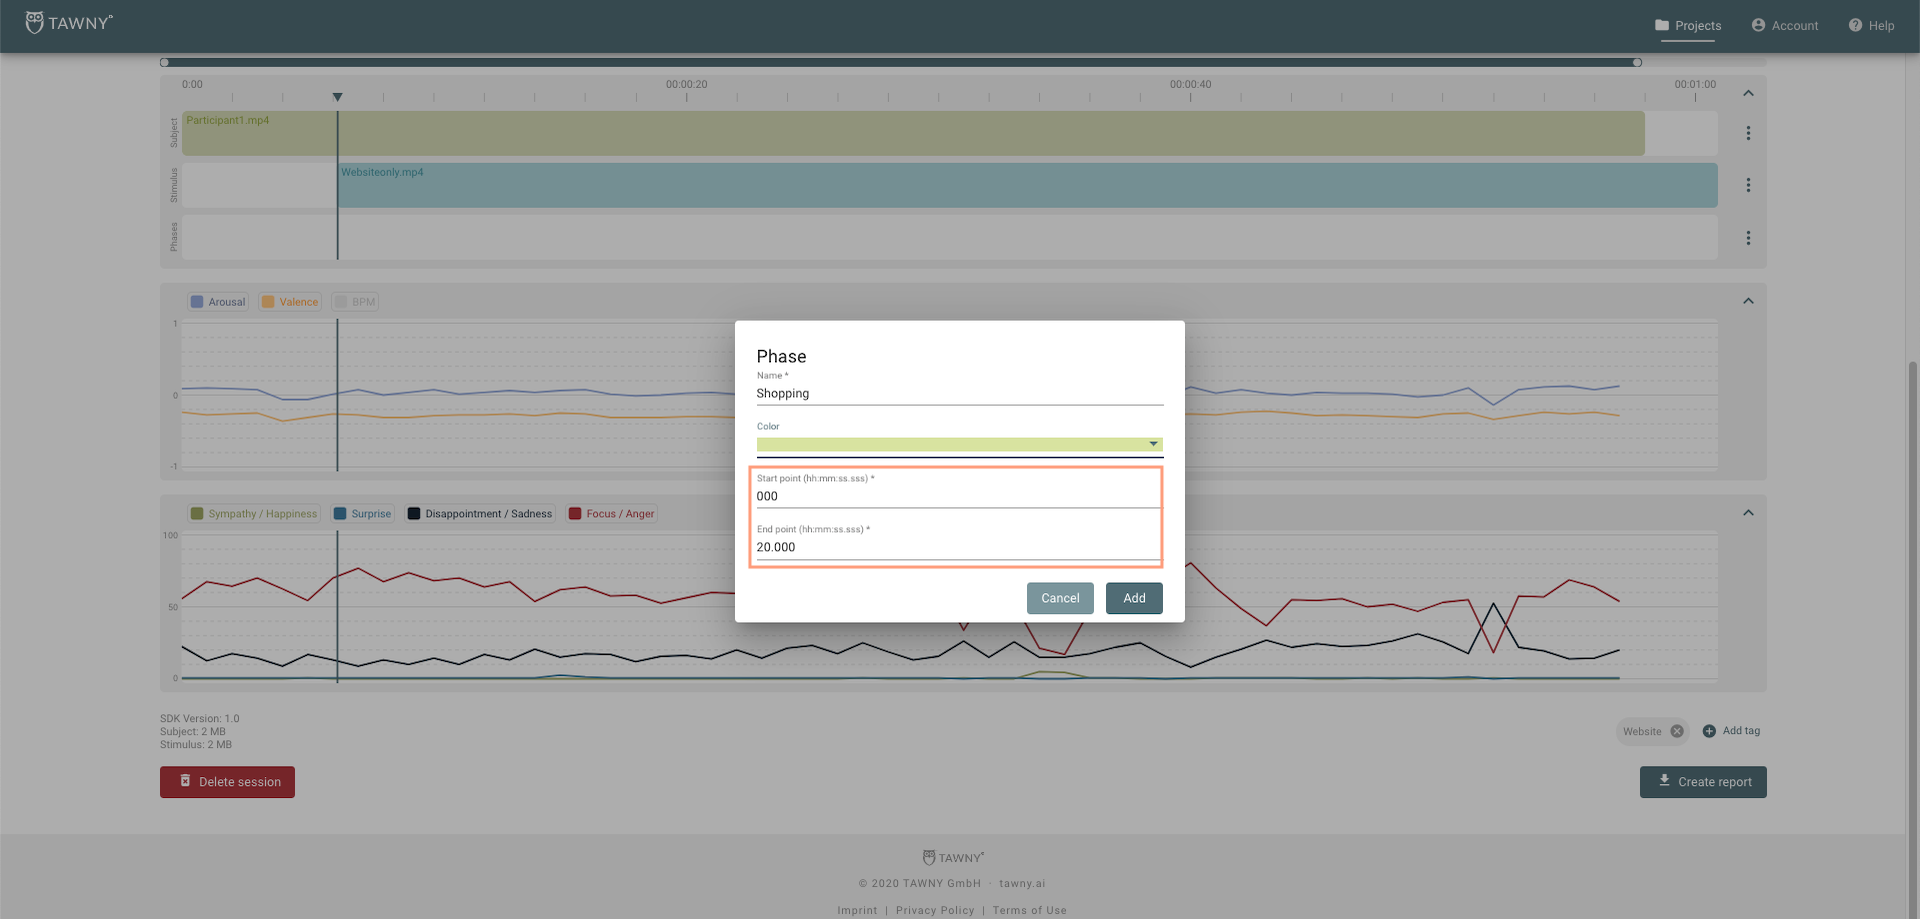
To determine when a phase begins and ends, you can manually enter the time for the “Start point” and the “End point” in the “Phase window”. Use the format: hh:mm:ss.sss. Then click on “Add”:
Alternatively, you can just create a phase without specifying the time and then manually shorten or prolong the duration of the phase directly on the “Phases timeline” by dragging it from the upper or lower corner:
# 7. Create a project report
You can create reports of individual or several videos.
To create a report from a single video:
Click on the “Create report” button in the bottom of the analysis screen of the specific video:
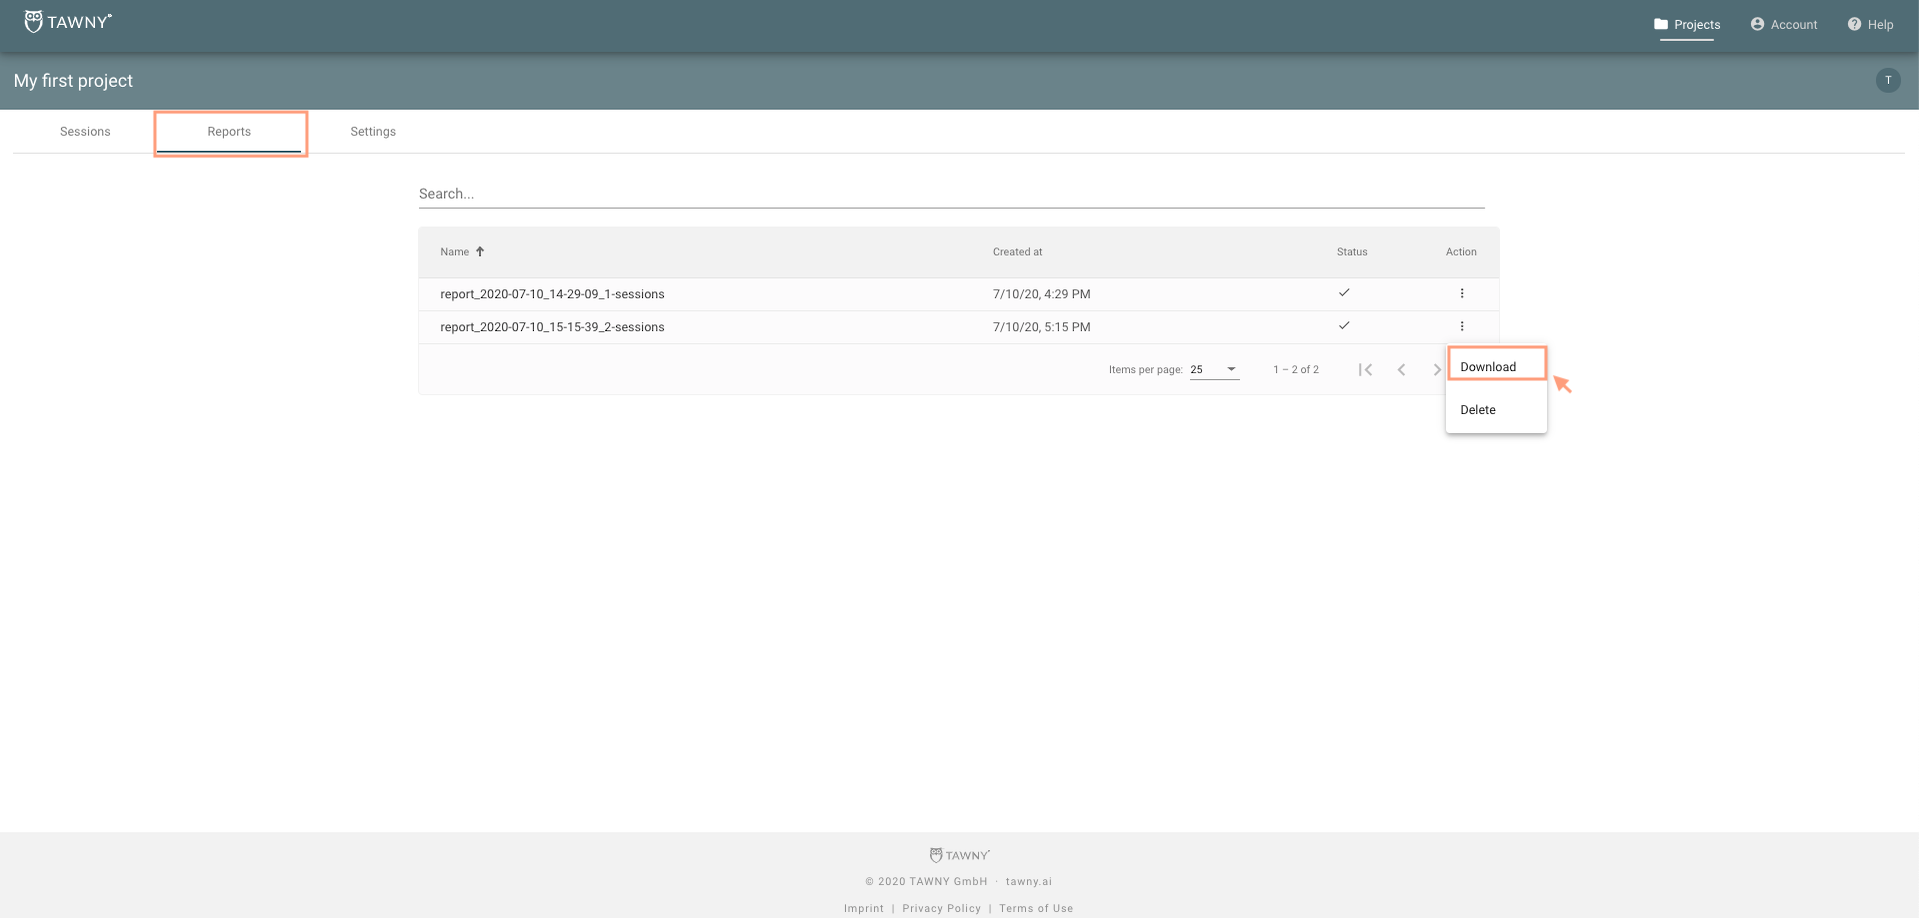
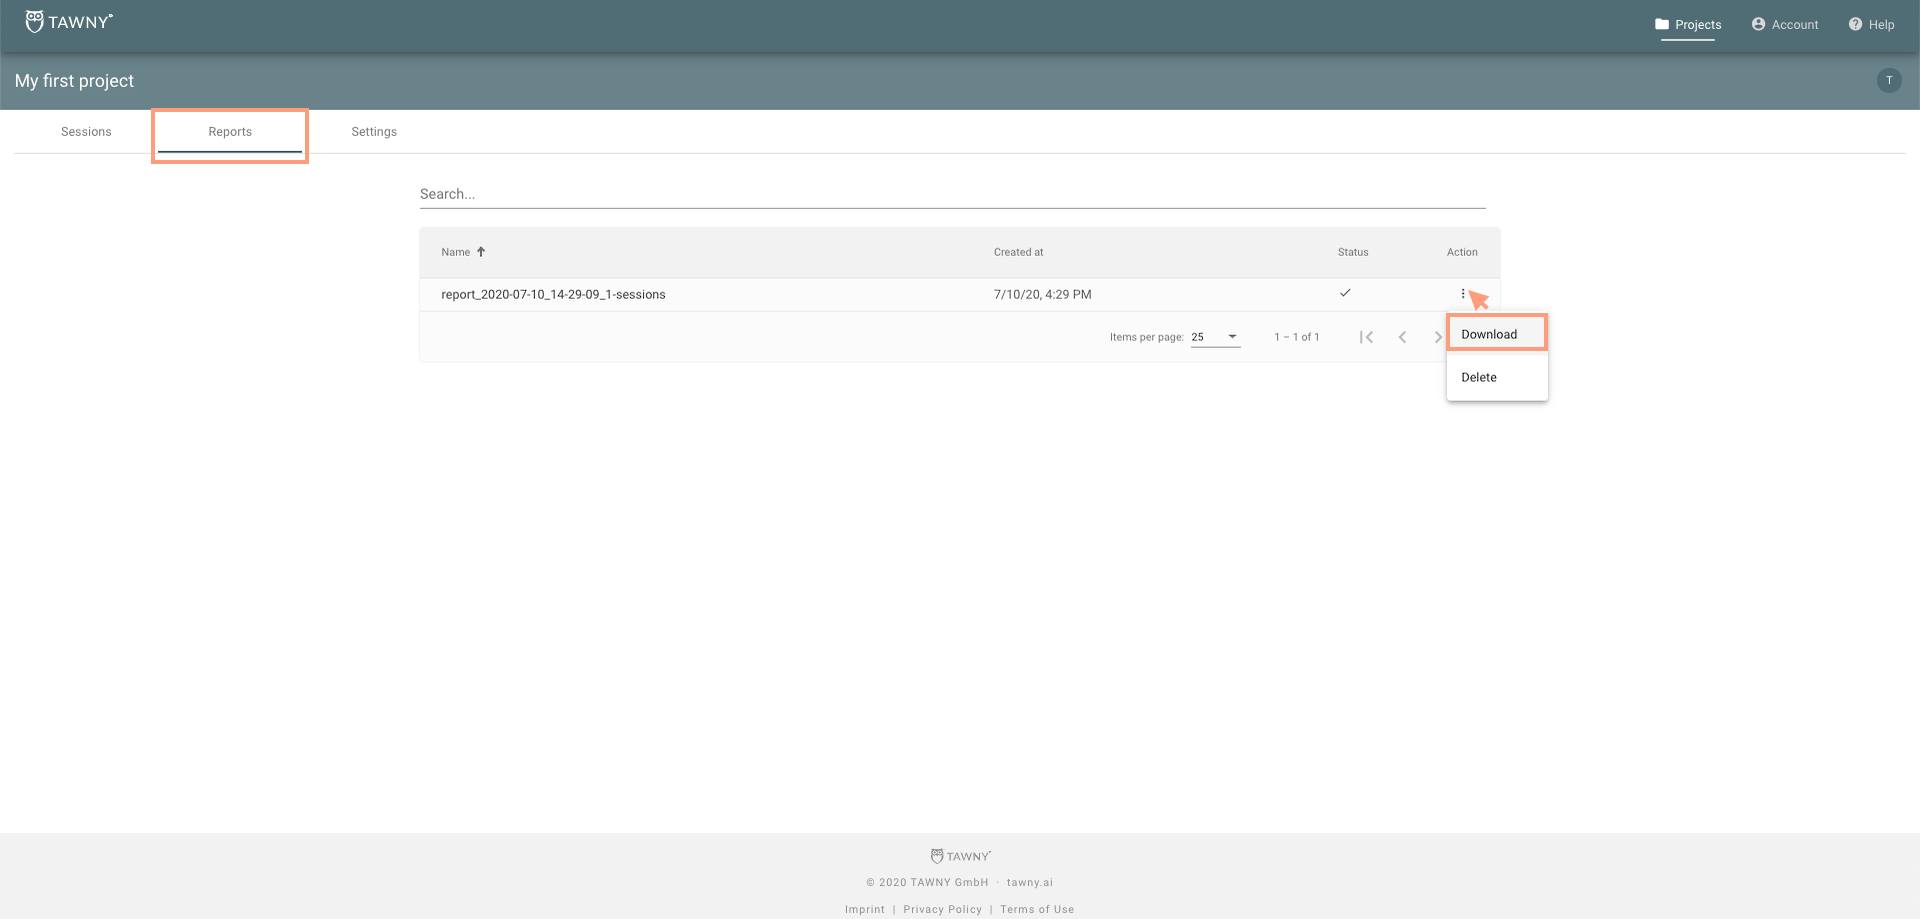
A report Zip file will be generated. To export the file go to the “Reports” tab in the respective project, look for the report in the list and then click on “Download” in the “Menu” on the right:
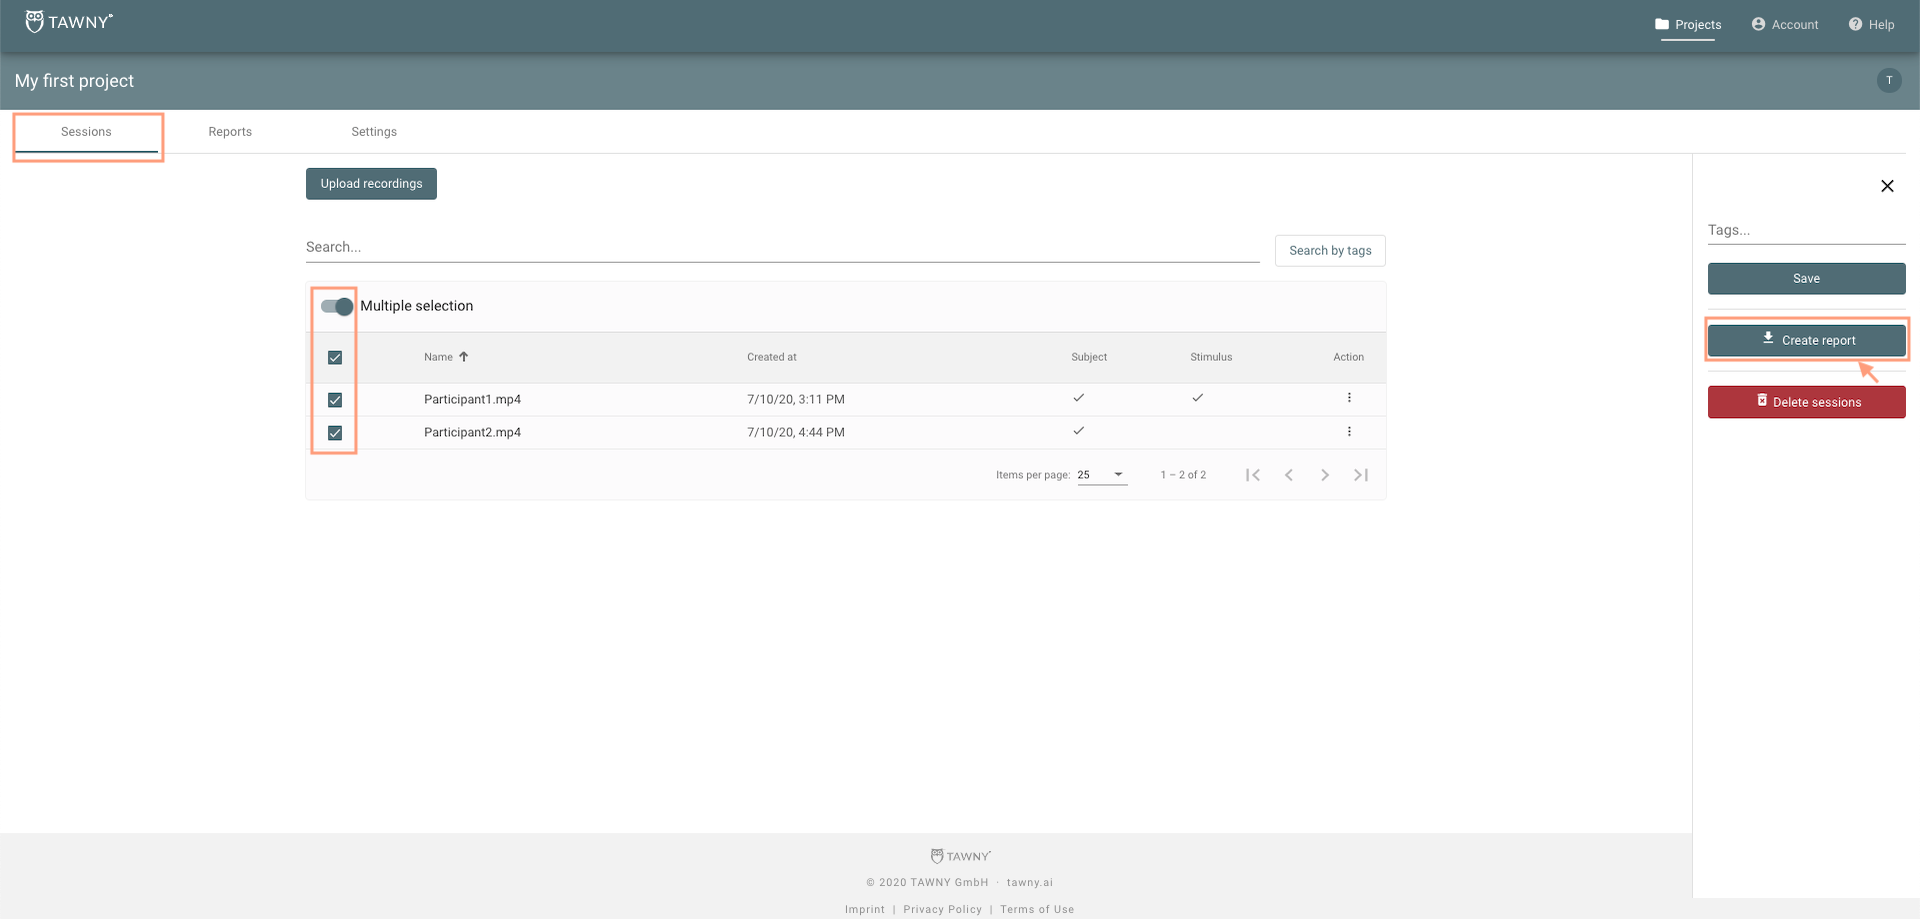
You can also create a report of several videos which you consider interesting to aggregate or compare. Option 1: select the videos you want in the report manually from the “Sessions” tab in the project.
- Just slide the toggle switch to “Multiple selection” and choose each video manually.
- Then click on “Create report”
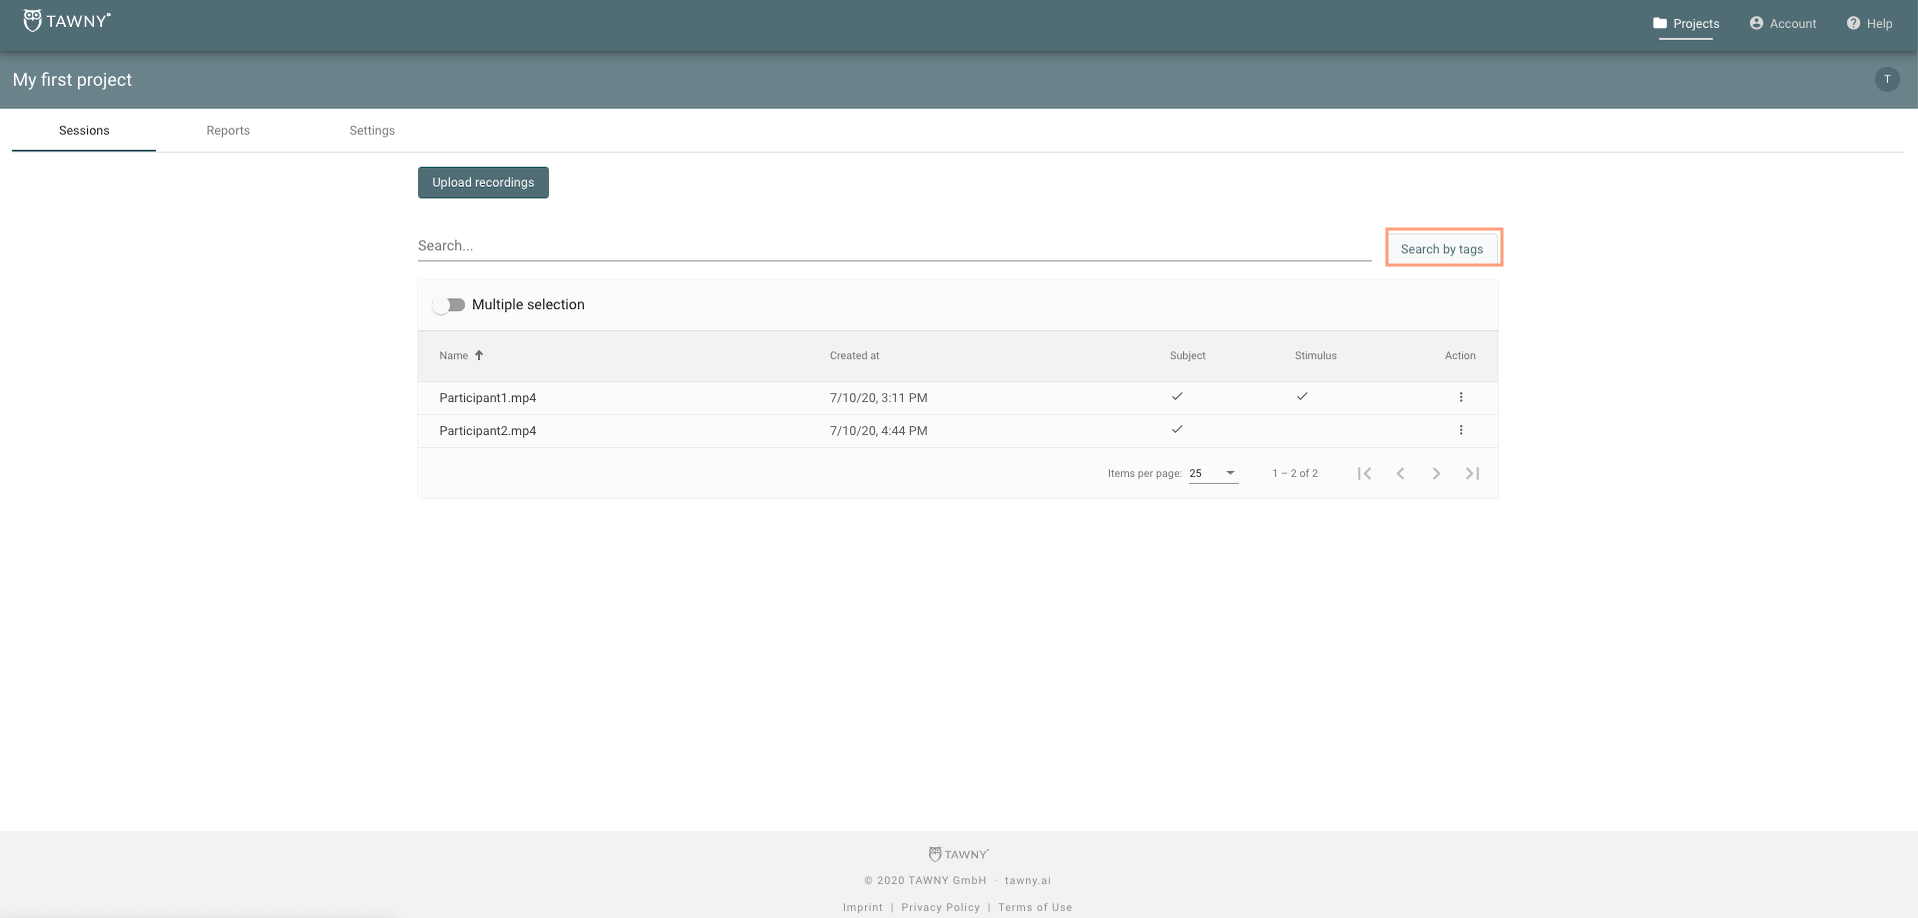
Option 2: create “Tags” to group/classify your videos. You can search for specific tags using the “Search by tags” button in the “Sessions” tab.
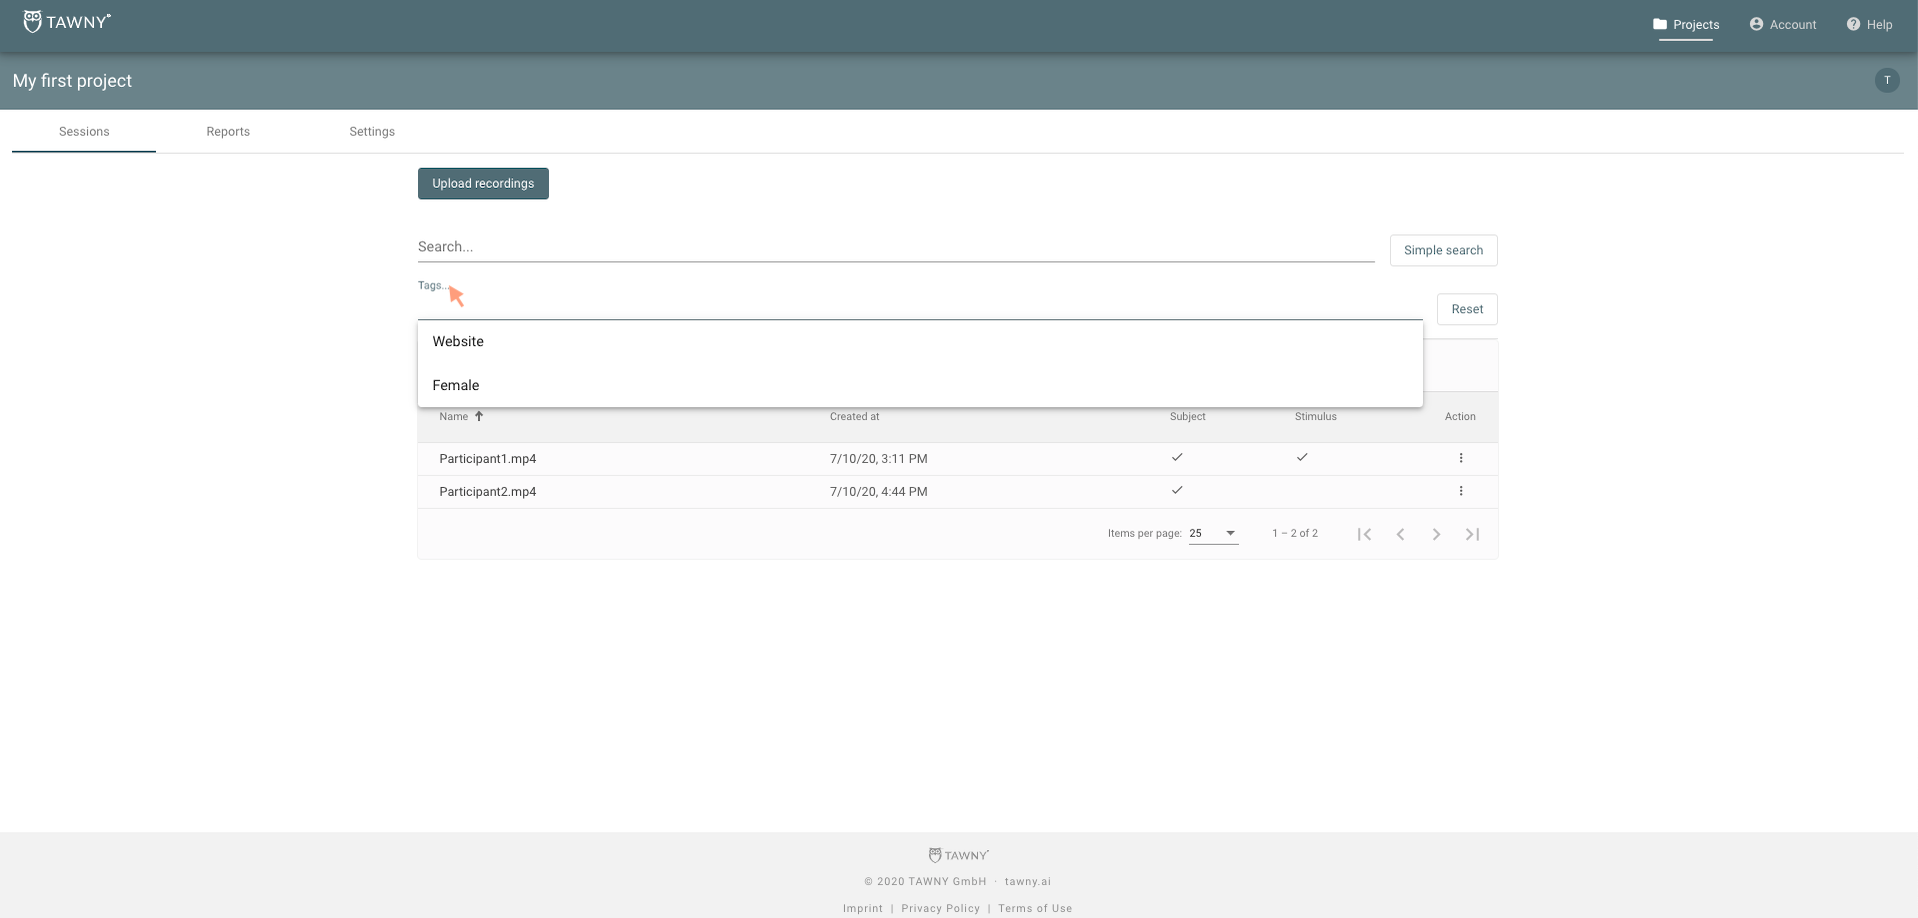
Type the name of the tag you are looking for or select it from the drop-down menu:
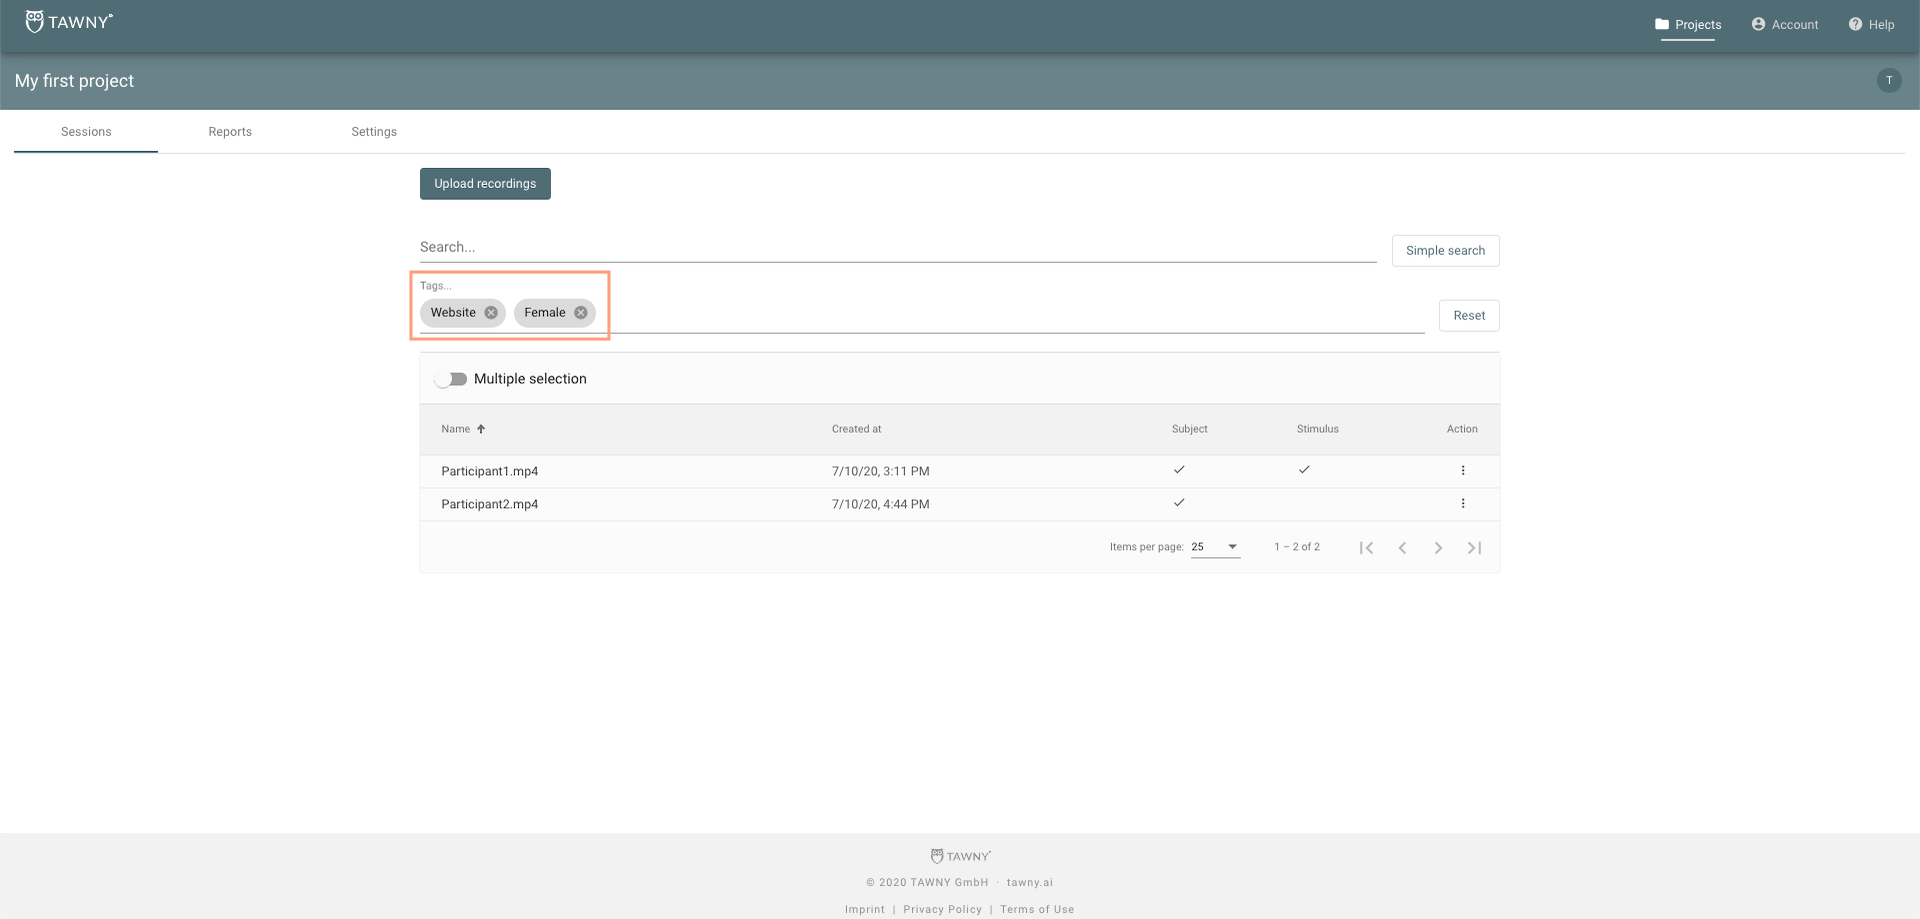
This will help you to filter those videos grouped into specific Tag categories.
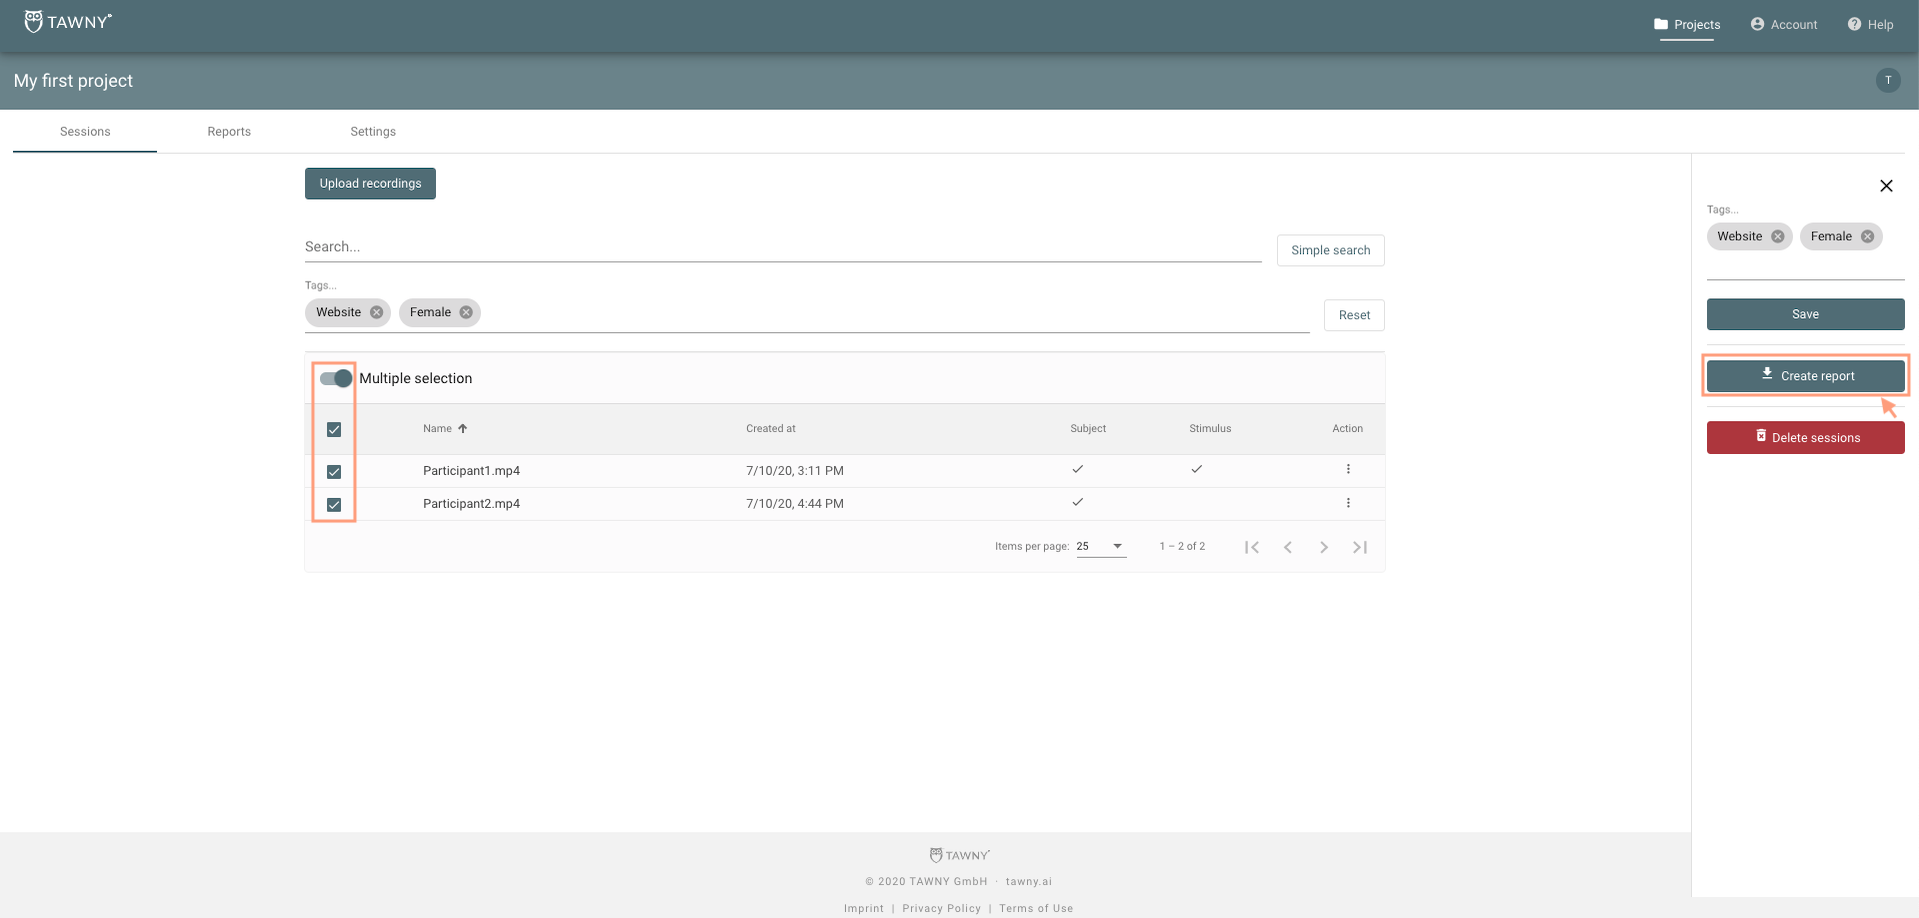
You can then slide the “Multiple selection” toggle switch and select the videos you want to see in the Report and then click on “Create Report”:
An aggregated report Zip file will be generated with the selected videos. To export the file go to the “Reports” tab in the respective project, look for the report in the list and then click on “Download” in the “Menu” on the right: